Hello everyone!
You should watch my Youtube Video Tutorial to see all the steps in action!
I am obsessed with Butter Chicken–it’s one of my Indian go-to orders (but I also love, in no particular order, Navratan Korma, Chicken Korma, and Saag Paneer). This recipe I have today was an exclusive one from Cook’s Illustrated. I made a few tweaks to their version of Indian Butter Chicken (Murgh Makhani), but they deserve all the credit and praise for this one. I have tried many home cook renditions of this, and it just never has that authentic taste. This one absolutely does!
The spices absolutely matter–do not substitute them. Also, don’t use standard “yellow” curry powder–for this recipe, with a few simple spices you can find, you can make your own, and it’ll be that much better. In fact, I hand ground my spices (I had coriander and cumin seeds) with my mortar and pestle, and I think freshly grinding the spices took it to the next level, for sure.
And although I am team “make your own everything,” Garam Masala is a difficult spice blend to master. This, I would suggest, buying already prepared.
Garam Masala gives the Butter Chicken its sweetness (Garam Masala tends to be some sort of variation of cinnamon, cardamom, etc.). It’s absolutely divine.
In addition, this recipe is smart because it uses yogurt to tenderize the chicken, and there’s use of tomato paste (instead of sauce) for better concentration of tomato flavor. In addition, I made this recipe so that both low and high carb eaters can enjoy (yes, even the “non” naan).
Most of my readers know how much I love my cooking gadgets, and today, I would like to feature my Blackstone Griddle. For those of you who don’t know what that is, essentially it’s a flat top grill, and it is one of the most versatile tools I have. The reason I use my Blackstone for this recipe is because a.) my fire alarm goes off easily, so when I use my broiler, I will have an incessant headache, b.) the Blackstone has so much “real estate”–32 inches of room to evenly sear all my chicken and not smoke my house, and c.) I can multi-task–I was able to make my sauce by putting my cast iron pot right on the griddle top and still have room to sear the chicken.
If you don’t have a Blackstone griddle, no fret. Just broil as specified below (the Cook’s Illustrated way). Any sort of grill would work here! Cooking outdoors is just something I love so much.
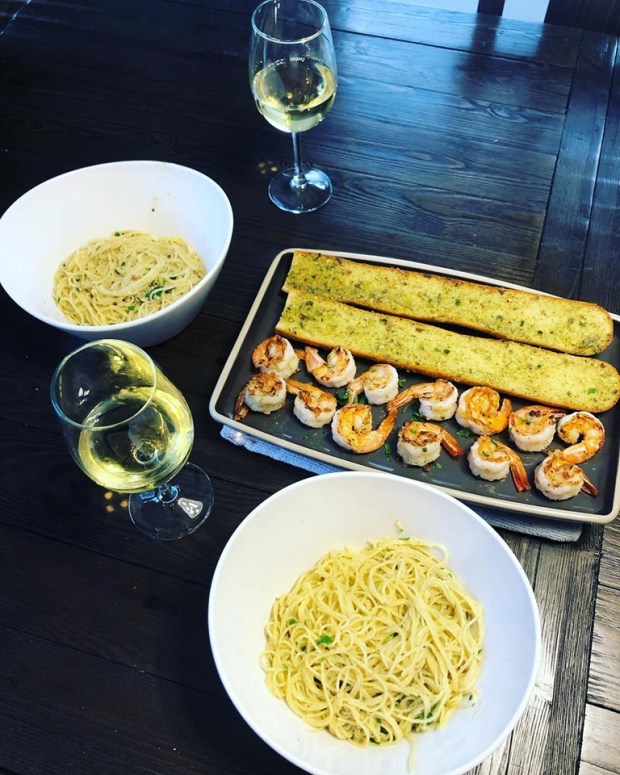
Ingredients for Butter Chicken (4 Servings)
- 4 tablespoons unsalted butter, cut into 2 pieces and chilled, divided
- 1 onion, chopped finely
- 6 garlic cloves, minced
- 4 teaspoons grated fresh ginger
- 4 teaspoons minced serrano chile
- 3 teaspoons garam masala
- 1 teaspoon ground coriander
- 1/2 teaspoon of ground cumin
- 1/2 teaspoon of pepper
- 1 1/2 cups of water
- 1⁄2 cup tomato paste
- 3 teaspoons sugar (or if you’re low carb, use a sugar substitute of your choice like Lakanto/Swerve–but use the powdered kind so it blends well)
- 2 teaspoon table salt, divided
- 1 cup heavy cream
- 2 pounds boneless, skinless chicken thighs, trimmed
- 1⁄2 cup plain Greek yogurt (if you’re low carb, I use the plain “Two Good” brand as it has the least amount of carbs)
- 3 tablespoons chopped fresh cilantro, divided
Cooking Steps for Butter Chicken Sauce
- Melt 2 tablespoons of butter in medium saucepan over medium heat. Add onion, garlic, ginger, and serrano and cook, stirring frequently, until mixture is softened and onion begins to brown, 6 to 8 minutes.
- Add garam masala, coriander, cumin, and pepper and cook, stirring frequently, until very fragrant, about 3 minutes. Add water and tomato paste and whisk until no lumps of tomato paste remain. Add sugar and 1 teaspoon salt and bring to boil.
- Remove from heat, stir in cream. Using immersion blender or blender, process until smooth, 30 to 60 seconds. Return sauce to simmer over medium heat and whisk in remaining 2 tablespoons of butter. Remove saucepan from heat and cover to keep warm. (Sauce can be refrigerated for up to 4 days; gently reheat sauce before adding hot chicken.)
Lei Mangia’s Method for Preparing Chicken (using a grill, preferably Blackstone Griddle)
- Dice chicken into small, bite sized pieces. Combine chicken, yogurt, and remaining 1 teaspoon salt in bowl and toss well to coat. If you have time, leave chicken marinating for at least an hour in the refrigerator.
- Preheat your grill on high (you’re looking for 450 or higher!) for a few minutes.
- Throw chicken with marinade on hot griddle/grill top and cook until caramelized and cooked thoroughly. Use tongs/Heavy Duty Griddle Spatula to keep chicken moving every minute or so.
- Put chicken aside to put into sauce later.
- Tip: The yogurt from the chicken will be left on the griddle. Scrape off your grill while it’s hot to make cleaning the easiest!
Cook’s Illustrated Method for Preparing Chicken (using an oven broiler)
- Adjust oven rack 6 inches from broiler element and heat broiler. Combine chicken, yogurt, and remaining 1⁄2 teaspoon salt in bowl and toss well to coat. Using tongs, transfer chicken to wire rack set in aluminum foil— lined rimmed baking sheet. Broil until chicken is evenly charred on both sides and registers 175 degrees, 16 to 20 minutes, flipping chicken halfway through broiling.
Finishing Steps for Butter Chicken
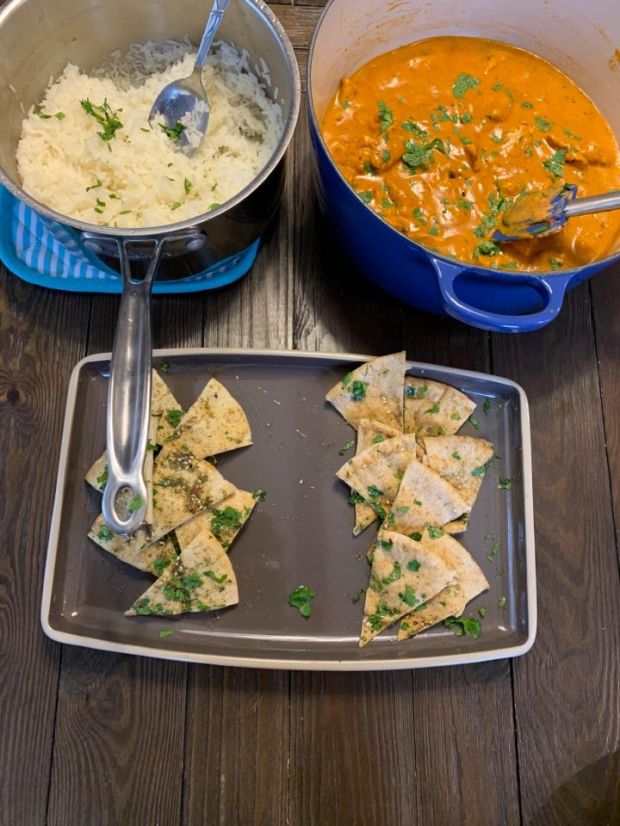
- Let chicken rest for 5 minutes. While chicken rests, warm sauce over medium-low heat. Cut chicken into 3⁄4-inch chunks and stir into sauce, if you did Cook’s Illustrated method. If you did Lei Mangia’s, the chicken is cut into chunks already.
- Stir in 2 tablespoons of cilantro and season with salt to taste.
- Transfer to serving dish, sprinkle with remaining 3 teaspoons cilantro, and serve.
Bonus Side Dish Recipes:
Basmati Rice
Ingredients
- 1 cup Indian basmati rice (or use jasmine rice, if difficult to find–good substitute)
- 1-3/4 cups water
- 1-1/2 tablespoons unsalted butter
- 1/2 teaspoon salt
Cooking Steps for Basmati Rice
**Please don’t skip rinsing the rice–it makes a difference!**
- Place the rice in medium bowl and add enough water to cover by 2 inches. Using your hands, gently swish the grains to release any excess starch. Carefully pour off the water, leaving the rice in the bowl. Repeat four times, or until the water runs almost clear. Using a fine mesh strainer, drain the rice.
- In a medium pot, bring the water, butter, salt, and rice to a boil. Cover the pot with a tight fitting lid, then turn the heat down to a simmer and cook for 15 to 20 minutes, until all of the water is absorbed and the rice is tender. If the rice is still too firm, add a few more tablespoons of water and continue cooking for a few minutes more.
- Remove the pan from the heat and allow it to sit covered for 5 minutes. Fluff the rice with a fork and serve.
Non “Naan” (Garlic/Za’tar)
**Or use actual Naan, if you have it/are making it!**
Ingredients
- 2 pita bread/Naan bread (Pro Tip: if you are low-carb, you can use this. It works not just as a Pita, but also as a Naan substitute!)
- 2 teaspoons of olive oil
- 1 1/2 teaspoons of garlic powder (or use two cloves of fresh garlic!)
- 1 1/2 teaspoons of za’tar
- 1/2 teaspoon of cilantro (optional)
Cooking Steps for “Non” Naan
- Preheat a pan/griddle to medium heat for two minutes.
- Put a light coating of olive oil down and brush oil on both sides of bread. (About half a teaspoon to 3/4 teaspoon)
- Cook each side for at least 30-40 seconds to soften.
- Drizzle remaining olive oil on top and put seasonings on top. Take off heat.
- Cut into eighths to make triangles (think of a small pizza).
- Enjoy!