Tortellini Two Ways: Brown Butter Sage Sauce and Béchamel, Ham, and Peas

tortellinitwowaysHappy Saturday! Today’s post is about making your own pasta filling and quick sauces without breaking the bank or being boring. I have a few tricks up my sleeve to help foster creativity and prevent wallet rupture. 🙂

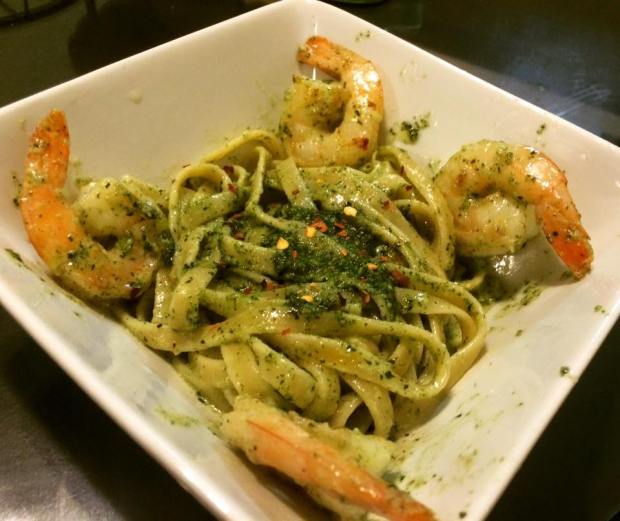
In my previous pasta posts, I talked about Alfredo, pesto, and ya-ya. Those are all delicious creamy sauces. When I want a creamy sauce, I am a sucker for all of the sauces listed above and vodka sauce. The problem with Alfredo, pesto, ya-ya, and vodka sauce is that they all require heavy cream. Heavy cream is not something I always have in my refrigerator, although I probably should! It can be pricey, and if I buy it, I often waste it; it expires quickly and isn’t something I use every day. What do I do if I want something creamy without running to the grocery store? I go for a béchamel. A béchamel is a white roux (equal parts of milk, flour, and butter); it is just and rich and decadent.

Let’s tweak the scenario that was listed before: I want something delicious, but I only want to use what I have on hand without making a special trip to the grocery store. What do I do then? I go for a brown butter sauce. As the name implies, all you need is butter and time: you let the butter brown over a consistent heat. It’s fabulous, and only more complex when heightened with sage. Sage is one of my favorite spices to use in cooking; it’s not implemented enough, and has such a unique, earthy profile. The marriage of sage and brown butter is simply perfect.

Making pasta is a lot of fun…for a rainy day. It’s very hands-on, which I love, but it’s definitely not something I can whip up quickly. The dough is simply pantry ingredients (flour, olive oil, salt, water, egg yolks), but getting the dough portioned and flattened is a pain. Pasta making can be finicky even for the most experienced. So here’s my secret weapon: Won Ton Wrappers.

For those who know me, I love Asian food and making my own: I am a sucker for any kind of dumpling (potsticker, shame, wonton), so I always have Won Top/Gyoza wrappers around. They are perfectly portioned and cost effective (about $2.00 for 52 pieces). But what many people may not realize is that a won ton and pasta are made of the same ingredients; therefore, when you are in the mood for something Italian, repurpose those wrappers and turn them into ravioli and tortellinis. You won’t regret buying a few. P.S: You can freeze these, so buy as many as you can so you’re always well-stocked. 🙂

The only bit of work that is required today is shaping the tortellini. I can say that you’ll get nicer edges with the square wonton wrapper, but if all you have is a Gyoza wrappers (the round ones), you will have a slightly less traditional looking tortellini. Don’t worry; it will be equally delicious! And if all else fails and all tutorials are useless, feel free to change dinner to Raviolis with Brown Butter Sage Sauce or Raviolis with Béchamel, Ham, and Peas. 😉

Whichever sauce or filled-pasta you choose, you will do no wrong. Go get ’em, tiger!

Basic Tortellini/Ravioli with Ricotta Filling 

  • 12 ounces Whole Milk Ricotta
  • 1-1/2 cup Freshly Grated Parmigiana (I always add more!)
  • 1/2-3/4 cup of Finely Shredded Mozzarella
  • 1 whole Egg
  • Salt and Pepper to your taste
  • Pinch of nutmeg (optional, but recommended)
  • 3-4 cups of arugula or spinach (your choice! you can do it without leafy greens)
  • 3-4 cloves of garlic** (only if you are sautéing spinach or arugula; I prefer spinach of the two for the filling)
  • 3 tablespoons of parsley and/or basil (mixed is fabulous: and fresh is best!)
  • 1 Tablespoon Olive Oil
  • 24-30 whole Wonton Wrappers

Make the Filling

  1. In a pan, heat up 1-2 tablespoons of Extra Virgin Olive Oil.
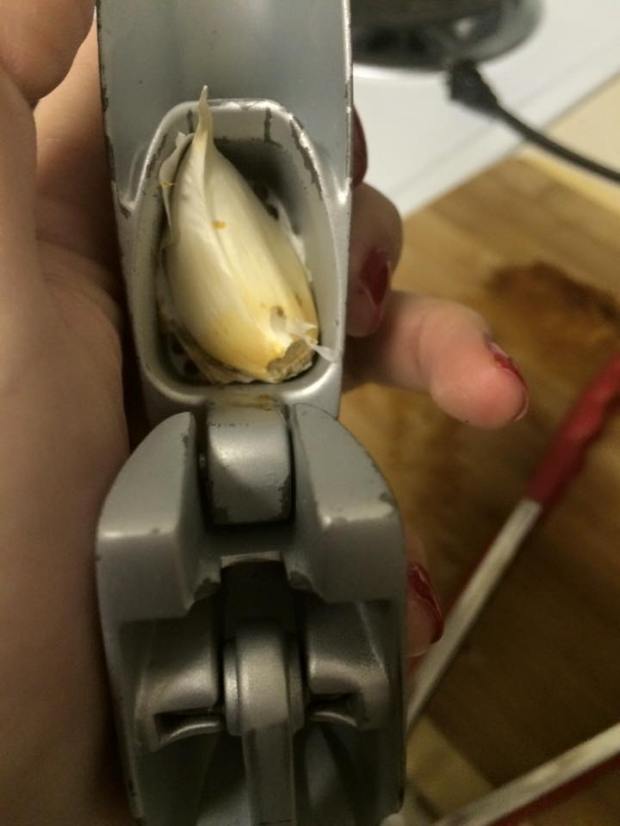
  2. Mince some garlic (3-4 cloves) and put in the pan that has olive oil.
  3. Throw in spinach (handfuls at a time) until it wilts. Repeat until all spinach is incorporated. Be sure to be stirring often so garlic doesn’t burn.
  4. Put spinach aside and give it about 5-10 minutes for cooling.
  5. Next, get a large mixing bowl. Take ricotta out of the container and add the cheeses. Stir.
  6. Next, throw in the sautéed spinach and mix. Next, beat one egg and throw into mixture.
  7. Mix well. Taste a small bit and add salt and pepper to taste. Throw in nutmeg, if desired.

Assemble the Pasta (Original Way)

  1. Place one wonton wrapper on a floured work surface.
  2. Use your fingers or a brush to moisten 2 adjoining sides of the wrapper.
  3. Place a little more than a teaspoon of filling in the corner opposite the moistened sides.
  4. Fold the moistened half of the wrapper to cover the other.
  5. Use your fingers to remove as much air as possible while pressing to seal the edges.
  6. Use a fork’s tines to press and further seal the 2 sides.

You now have a ravioli. Want to take it to the next level? Make a tortellini:

  1. Use you finger to make an indentation in the middle of the filling pushing up.
  2. Bring the two opposing corners together, moisten one, and press together to seal.
  3. Bend backwards the remaining corner.
  4. Please seal everything
  5. Reserve on a separate plate for later cooking or freezing.
  6. When ready to cook, get a pot of water salted and boiled. Pasta takes 3-5 minutes to cook; you’ll know they are ready when they begin to float on top.

Assemble the Pasta (New, Easy Way)

In the production of this post, I found an easy way to create a tortellini. <–silly video demonstration is here.

  1. With a Gyoza/Potsticker wrapper (round not square), put half a teaspoon of filling on the edge, not the middle. You do not want to overfill.
  2. Wet your finger lightly and circle the outer edge of the potsticker wrapper. This is how you will seal the filling on the inside–no egg wash is necessary!
  3. Slowly roll the potsticker until it looks like a skinny log.
  4. Once you have a log, bend both ends and try to seal them
  5. Pinch the one end onto the other to make a ring.

Pick Your Sauce…or do both.

Brown Butter Sage Sauce

  • 8-10 fresh sage leaves, chiffoned (sliced thinly) or 2 teaspoons dried sage
  • 6-8 tablespoons of butter (depends how much pasta you’re making)
  1. Melt the butter in a large skillet over high heat.
  2. Cook, stirring, until the butter develops brown flecks and smells nutty.
  3. Watch it closely to keep the butter solids from burning. Remove from the heat and add sage.
  4. Stir and place on top of freshly prepared pasta and eat immediately.

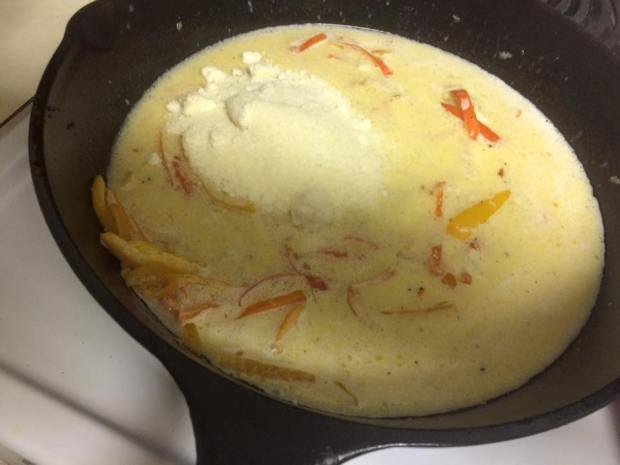
Béchamel, Ham, and Peas Sauce

  • 1 stick unsalted butter (4 ounces)
  • 2-3 cloves of minced garlic (optional, but interesting!)
  • 1/2 cup and 2 tablespoons all-purpose flour
  • 1 quart whole milk, at room temperature
  • Pinch fresh nutmeg
  • Salt and white pepper* (Black pepper is fine, too)
  • 1 cup grated fontina or parmigiana
  • 1/2 of pound of ham, diced or for a more delicate palate, thinly sliced prosciutto julienned
  • 3 tablespoons unsalted butter, diced
  • 1 cup of frozen peas (or more to taste–I love peas!)
  1. In a 2 quart saucepan, melt the butter over medium heat. Add minced garlic and stir, if desired. Add the flour and whisk until smooth, about 2 minutes.
  2. Always stirring, gradually add the milk and continue to whisk until the sauce is smooth and creamy.
  3. Simmer until it is thick enough to coat the back of a spoon. This will take approximately 10 minutes. Towards the end, throw in frozen peas (they don’t need much heat to cook)
  4. If the sauce is not thickening, lower the heat/remove from heat.
  5. Remove from heat and stir in nutmeg, 1/2 cup fontina, ham (or prosciutto) and season with salt and white pepper.


Beef Bourgnoine Pot Pie with Thyme

12540670_10205635552181311_1745134031796119099_n

Tonight, I am channeling my inner Julia Child; you know, the ultimate American chef who was largely inspired by France; she is the brilliant author of Mastering the Art of French Cooking. Many culinary masterminds of today revere Julia the same way I do; we bow down to her like she is a shrine. I don’t really believe in buying cookbooks in the modern era (we have Pinterest, blogs, Food Network), but if you’re looking for a worthy investment, buy Mastering the Art of French Cooking. Although her recipes are time-consuming, they are worth every minute of effort, and I have yet to make something of Julia’s that has ever failed.

My goal for this blog is to provide the same sort of confidence in my readers; I don’t want to intimidate readers with the concept of making fancy French food, but I would not really be able to feel like I am offering any true help if all I do is post recipes that are so simplistic that the meals yield tasteless results that barely qualify as “sustenance.” I really love French food, and I believe most people do love it too, but they may not realize that the very flavors that they love is inherently from France. Almost all mirepoix-based recipes (onions, celery, carrots), essentially anything garlic-based, and entirely anything that is braised/reduced from wine is French. Tonight’s dinner, Beef Bourgnoine Pot Pie with Thyme, does all of the above and is fancy without being snobby; it’s comforting without being complicated, and it’s a hybrid of hands on and hands off that this would be suffice for a wintery weekend project.

No, it’s not a “dump” dinner; there are no cans of condensed soup, and there are not any typical shortcuts, but you can use a Crock Pot (happy now?) or simply a dutch oven if you like. There is enough work in this to feel rewarding, and there is enough time waiting to watch a Netflix series or two.

So the classic Boeuf Bourguignon is a beef stew that is enhanced with time and a burgundy wine that is usually paired with noodles. Now as much as I love Julia Child’s Beouf (BOOOF: it’s funny to say, isn’t it?), it needs the carb of all carbs to heighten its deliciousness: A pie crust. Tell me what is better than a flaky, buttery pie crust? I am sure that there is nothing that is reigns supreme. I have always loved pot pie growing up, especially chicken pot pie (which, I will eventually post, but I am so tired of cooking chicken the past few weeks), but there is something about making beef the star of the show that makes this feel elegant and special. Again, this is a great recipe for a wintery night in, and it could be made for individuals (like I did through ramekins), or it could feed a family (like the size of an army). There is enough flexibility in this recipe that it can be romantic or practical: it’s your call. Although I am not offering too many shortcuts, I will offer alternatives in case you’re not feeling like giving it your all: the option for a slow cooker, vegetable swaps, slack on some ingredients, and already prepared pie crust. You can make this what you want, but you will not skimp on anything unless I tell you, okay? 😉

If you like Beef Pot Pie, but want to heighten flavor (or want to stop yourself from drinking too much red wine), this is the recipe for you. This is a slightly upscale and downright comforting pot pie that I hope you’ll enjoy for years to come. Bon appetit!

Tools and Ingrédients (did you know that the latter was a French word?)

Tools

  • Cast iron skillet* (or a regular frying pan is fine)
  • Slow cooker or dutch oven–your choice!
  • Tongs
  • Slotted spoon
  • Chef’s knife
  • Pastry brush
  • Ramekins/Pie plate (depends on whether you’re making for individuals or a crowd)

Ingrédients

  • Two strips of bacon** (optional–didn’t do it this time, but it would be awesome!)
  • 2-3 tablespoon extra virgin olive oil
  • 2-3 lbs lean stewing beef, cut into 2-inch cubes (I like Chuck Roast; it’s inexpensive and the perfect meat to cook low and slow)
  • 1-2 carrots, peeled and sliced (or diced)
  • 1 yellow onion, peeled and diced finely; alternatively, you could use a bunch of pearl onions so you don’t have to cut anything at all!
  • 4 red potatoes (or two full-sized potatoes of your choice: Yukon Gold would be good, too), diced
  • 1-2 cups of peas (less or more to taste–please don’t add until the end!)
  • 1 teaspoon salt for stew, general covering for meat (more to taste, but preferably sea salt)
  • 1⁄4 teaspoon pepper, general covering for meat, freshly ground (more to taste)
  • 2-3 tablespoons flour (more depending on thickness preference of gravy)
  • 3 cups dry, red wine (I used Pinot Noir, but typically you would use a full bodied wine like Bordeaux, Burgundy, or Chianti–make sure it’s good enough to drink, not cheap red wine)
  • 2 -3 cups beef stock
  • 1 tablespoon tomato paste (I didn’t have any, so I used some sauce because my sauce was thick enough)
  • 6 garlic cloves, mashed (you may choose to add more–I also roasted mine for a more mellow flavor, but that’s optional too)
  • 1-2 tablespoons of Dijon mustard
  • 1-2 cups of finely shredded Cheddar cheese** (optional, but it’s cheese–that’s your conscience)
  • 1-2 tablespoons of low-sodium soy sauce
  • 15-18 sprigs of fresh thyme (dried is not allowed; it doesn’t have the same effect)
  • 1-2 bay leaves preferably fresh (optional–I didn’t use it this time; just make sure you remove it before you serve the food!)
  • 1  prepared pie crust (your own, this awesome recipe, or refrigerated/Pillsbury goodness); you could use puff pastry as well!
  • 1 beaten egg (for egg wash on pie crust)

Mode d’emploi (or simply  say “directions”–yes, another French word–you know more than you thought! Oui!)

  1. Prepare all your vegetables (and meat if you are cubing before searing) before doing anything below! Slice and dice for bite size eating!
  2. Place a rack in lower third of oven; preheat to 400° (whether you are roasting garlic, using a dutch oven, or crock pot–you will either use the oven the whole time or part of the time!)
  3. Optional: put six cloves of garlic in aluminum foil and put half a tablespoon of olive oil. Wrap up cloves and roast in the oven for 40 minutes until golden yellow. Once garlic is done roasting, stuff into the crevices of the meat. Alternatively, you may skip this and use sliced garlic cloves that aren’t roasted and insert similarly.
  4. To begin searing the meat, heat olive oil in a large, heavy pot (dutch oven) or cast iron skillet (if using slow cooker) over medium-high.
  5. Season Chuck Roast liberally with salt and pepper. You may cut the roast in pieces now or later; I left it whole to get the equal coating, and then cut later. It doesn’t matter.
  6. If desired, add light amount of flour to beef and toss to coat; shake off excess.
  7. Working in batches as needed to avoid steaming meat, cook beef, turning often with tongs, until browned all over, 8–10 minutes per batch or 8-10 minutes per side (when not cut up and meat is left whole).
  8. Transfer to a plate. Make sure you have a sear–don’t lift the meat too early! It should be really cold and rare on the inside, but have a caramelized brown on the outside.  If you haven’t cut your meat yet, now is the time; cut it into 2 inch cubes, skimming off excessive fat.
  9. Optional (bacon is not required): Cook bacon in same pot, stirring often, until brown and crisp.
  10. Dutch Oven: After frying bacon (or not using bacon but just searing meat), add ¼ cup of red wine to deglaze the pan, scraping up browned bits, then add onion, potatoes, and carrots and cook, stirring occasionally, until vegetables start to soften, about 5 minutes. Once softened, add meat back into the dutch oven. Go watch an episode or two of your favorite show on Netflix.
  11. Slow Cooker:  After frying bacon (or not using bacon but just searing meat), add ¼ cup of red wine to deglaze the pan, scraping up browned bits, then throw deglazed liquid into a slow cooker that is turned on low.  After a brief sauce, add onion, potatoes, and carrots. After about a half an hour, add meat back into the slow cooker. In addition, take the leaves off of 10 thyme sprigs, soy sauce, tomato paste/sauce, and Dijon mustard. Stir all of the ingredients. Lastly, add the beef stock and rest of required red wine to cover.  Watch an entire season or two on Netflix.
  12. Cover pot and braise in oven until beef is very tender, 1½-2 hours if in a dutch oven. If using a slow cooker, the meat should be ready in about 6-8 hours on low–DO NOT USE THE HIGH SETTING–it will make the meat very tough! Low and slow, baby!
  13. Depending on your method, check on your meat (do not check too often as this will slow down the cooking process) and determine taste and gravy thickness. If you would like a thicker gravy, get equal parts of flour (1-2 tablespoons) and water and whisk. Add floury mixture to the pot and stir contents of the pot until you achieve your desired thickness of gravy. If your gravy is too thick, add more wine or beef stock to reclaim.
  14. Once your meat, vegetables, and potatoes are tender and tasty enough, get out ramekins (individual portions) or pie plate. Also, get our your pie crust from the refrigerator. If you’re using already prepared crust, microwave/thaw to your package’s directions.
  15. Once the puff pastry/pie crust is thawed and ready (and I hope your oven is still pre-heated and ready to go), turn your pie plate or ramekins upside down. Trace slightly outside of the shape in order to cut an appropriate pie portion. If you like, you can cut out shapes with the excess and design your pies.
  16. Put filling (about 3/4ths of the way) inside ramekins/pie plate. Add one sprig of more thyme leaves per individual portion (if using a ramekin, do one per ramekin, eight for a pie). After thyme is placed, throw in some frozen peas. Next add shredded cheddar cheese to coat the top of the mixture.
  17. Next, put pie crust on top with a slight overhang. If you cut too short, you can add an overhang with leftover pie crust.
  18. Crimp the pie crust edges, and use a fork to adhere. Once desired pie crust design is done, beat a single egg and use a pastry brush to egg-wash your pie crust. You need this to get it golden brown! Make sure you paint that whole pie golden yellow with egg wash!
  19. Bake until crust is deep golden brown, 30–35 minutes. Let pie cool for about 15-20 minutes before consuming.
  20. Be glad that you made this. P.S: Leftovers are even better; it’s a gift that keeps on giving! 🙂

Blueberry Crumb Cake with Streusel Topping

12401029_10205626593717355_4276957506519400865_n

Happy Friday! It seems to be that everyone I know is experiencing some sort of insane weather, so this might be the perfect recipe if you’re stuck inside like many of us are! I would also save this for a “rainy/snowy/icy day” because there are a lot of dishes involved (sorry), but not really any more fuss than that. I love recipes that involve one mixing bowl, but generally speaking, this rarely happens because of the importance of having wet and dry ingredients separated. What adds another “bowl” to your dish load is the cream cheese layer, which should justify the elbow grease!

I am not really one for rules, but with baking, I have to conform. Separate dry and wet ingredients, level when you measure (make sure your cup and a half is actually a cup and a half), and make sure that your butter and eggs are actually room temperature (for as long as possible–the longer they are authentically room temperature, the better the flavor!) Of course these rules are not only applicable to this baked good, but all of them. All the rules stress me out in baking, but the results are usually always perfect. Predictability is rather comforting.

Speaking of predictability, I had to improvise an oven situation for today because I used a new oven cleaner in my main oven, and when I turned it on, the solution did not come off as I thought it did and started to smoke and smell chemical-laden. Blah. I think I’ll stick to my old ways of oven cleaning. I figured that NH3 (ammonia) at 350 degrees would not really make my cake so delicious, so I turned on my toaster oven and pulled out the racks to make way for my crumb cake. I couldn’t believe that I had enough room in there to put in my springform pan! I was scared it wouldn’t cook evenly (what if my Black and Decker isn’t the right temperature?), but it all worked out fine. The recipe is infallible.

Going back to this cake in particular, it is technically a “coffee cake,” which is very misleading because there is no coffee in it. However, coffee is the perfect compliment, and if you’re a coffee lover, make sure you have your java ready to go. I like calling it a crumb cake because of the streusel topping. Normally, when I eat streusel topping, it’s overly sweet and overpowering. This cake and topping is not excessive in its sugar content which I think makes it great to eat any time of day (particularly, breakfast). There are blueberries in it which makes it antioxidant-filled and less guilty. So yes, even resolutionists can eat this cake with moderate ease.

Let’s get started!

The Usual Suspects

You’ll basically need a stick of butter, three eggs (one of which will be divided by egg yolk and egg white), sour cream,  cream cheese bar or Neufchâtel, vanilla extract, flour, baking soda, baking powder, salt, vanilla, blueberries (fresh or frozen). You have most of these within your pantry and refridgerator, and here’s a fun tip: get blueberries at the dollar store (yes, I have and they’re great for baking!)

Filling:
  • 8 oz. cream cheese-softened (if you’re feeling healthy like me (ha), you can use Neufchâtel cheese because there is less fat and no taste compromise)
  • ¼ cup sugar
  • 1 egg white
  • 1 cup blueberries (fresh or frozen)**(if frozen, please coat those suckers with flour so they don’t sink! Also, do not defrost blueberries!)
Cake Layer:
  • 1 ½ cups all-purpose flour
  • ½ teaspoon baking powder
  • ½ teaspoon baking soda
  • ¼ teaspoon salt
  • 5.5 Tablespoons unsalted butter- softened at room temperature
  • ½ cup sugar
  • 1 egg
  • 1 egg yolk
  • 1 teaspoon vanilla extract
  • ¾ cup sour cream
Streusel layer:
  • ⅓ cup sugar
  • ½ cup flour
  • 3 tablespoons butter-chilled and cubed (very, very cold!)
Start Your Engines 
  1. Preheat oven to 350F. Grease 8 or 9 inch springform pan; you may use parchment paper if you have it, but if you butter the bottom enough, you won’t need it. Make sure you grease the sides of the springform pan!
  2. Filling: Mix together the cream cheese/Neufchâtel and sugar on medium-low speed until creamy. Add egg white towards the end of the process; mix on low just to combine. (Please save the egg yolk from this for the cake batter!) You may add vanilla in here, if you wish (but it’s not necessary.) If you don’t have another mixer bowl, wash it out and put mixture aside in a separate bowl.
  3. Cake: In a bowl, begin your dry ingredients. Whisk together flour, baking powder, baking soda, salt, and set aside. With an electric mixer cream together the butter and sugar on medium-low speed until fluffy. Slowly add egg, egg yolk, and vanilla. Slowly mix in the flour mixture alternating with the sour cream carefully. Transfer the batter into the prepared pan and smooth with a spatula. Next, spread the cream cheese filling on top.  Coat blueberries (if frozen) in flour, and shake off excess (make sure it looks like they’re covered). Arrange blueberries onto cream cheese filling on top. You may add more than a cup of blueberries, if you wish. You could alternatively make a blueberry jam and spread it on for a twist, but the whole blueberries here are just fine.
  4. Streusel: Combine sugar, flour and chilled cubed butter in a bowl. Stir with a fork or pastry blender until the mixture is crumbly. I personally use my hand as I think the heat transfer and a gentle hand makes this process easier (I scrunch my hand and lightly use my thumb against my ring, middle, and pointer finger to crumble.) Make sure the streusel is in pea-sized crumbs. Sprinkle the streusel on top of blueberries.
  5. All together: Bake for 40-45 minutes until a cake tester inserted in the center comes out clean. Cool on a rack.  Once cooled, run a thin knife (butter knife) around the cake and loose ring of springform pan (if you buttered enough, this won’t be necessary.) Store in the refrigerator as it tastes better chilled. Serve with a cup of coffee, duh.

Navratan Korma (Vegetable Korma) and Jasmine Rice

12565405_10205605181862072_3872479665134238214_n

Happy Martin Luther King Day! I very much needed today off. And to help spread the word of peace as per MLK, I decided to think of the most peaceful country of all–India.

I love the flavor of Indian food; the problem lies, however, in its presentation: it looks like mushy baby food. It’s truly hard to get a wonderful presentation out of the saucy curries, but if you put looks aside, you’ll enjoy one of the most unique flavors known to the world. Another fear lies in that it can also be overwhelmingly spicy if one is not cautionary. Again, put your fears aside, and know that even the wussiest eater could indulge in certain dishes, particularly this one!

Often times people are afraid of Indian food; they rarely eat it out, and even more seldom, cook Indian at home. Honestly, the largest obstacle is getting the authentic ingredients. If you go on kicks like I do, you’ll eventually stock up enough spices to make every thing.

But in case you want Indian and you don’t want to invest like I have, today’s post is a popular dish with simple ingredients. I have seen recipes with even more authentic ingredients, but the issue is that it’s not very accessible even for the Indian spice hoarder like me.

No, I am not an Indian historian, but the little I do know I will tell–firstly, Navratan means “nine gems” and, if I’m not mistaken, korma is the cooking process, which is “braised.” Korma is not exclusive to Indian; for example, Turkey has their own version called “kavurma.” Countries within this region have variations of this curry with yogurt/cream sauce.  While we are not literally eating an array of rhinestones, the dish is loaded with assorted vegetables and possibly fruits.  In theory, you should have nine different vegetables and/or fruits. I will provide a suggested list in case you’re not feeling too daring.

Another reason I am posting this recipe is that there are very few rules; you can add whatever vegetables (even fruits) you have in your refrigerator and pantry.  Do not be afraid to make it your own. I will advise, however, that you eat Navratan Korma (or Chicken Korma) out at a reputable Indian restaurant to make sure you have some sort of reference point when making your own Korma. It’s always a good to be inspired!

To me, this dish is comparable to a beef stew (without the meat, but the meat is welcome–chicken is your friend here). It’s saucy and comforting to eat; similar to stew, it is best soaked up with a carbohydrate. This dish is excellent (and I will almost like to say it is required) with jasmine rice, and even more divine with garlic naan to mop up the sweet deliciousness. And while the consistency, appearance, and vegetables are akin to a “beef stew,” the flavors are simply distinct. There is this sweetness that comes from the Garam Masala, a purely Indian flavor. There is a creaminess from the coconut milk that is married with curry. The vegetables take on all the gold (as the color, if you’re not like me and put too much curry powder, could be a yellow) that this sauce has to offer.

Before I begin, I want to say there are some ingredients on my list that are not negotiable. I know, I told you I would be flexible, but without some of these, it’s no longer a korma. It might still be a curry, but it’s not a korma if you don’t have…

*Cashews

*Coconut Milk (you can use heavy cream, but more authentic approaches would be coconut milk)

*Garam Masala

*Curry Powder (I don’t care if its simply McCormick Curry Powder–it’ll work here! You need the yellow from the Tumeric)

Okay, simple enough? Here we go…

Non-Protesters

  • 1 1/2 tablespoons of Extra Virgin Olive Oil (or any other oil)
  • 1 small yellow onion, diced
  • 1 teaspoon of minced fresh ginger root (add more if you want)
  • 4 cloves of garlic, minced
  • 2 potatoes cubed ***
  • 4-8 ounces of tomato sauce (this depends on how much you’re making–you may need to add sauce as you go–I recommend the sauce you don’t need to open with a can so you can throw it back in the refrigerator)
  • 2 teaspoons of salt
  • 1 teaspoon of pepper
  • 2-3 tablespoons of curry powder
  • 2-3 tablespoons of garam masala
  • 1-2 tablespoons of white sugar
  • 1 cup of frozen peas ****
  • 4 carrots cubed ***
  • 1 can of canned corn***
  • 1 can of coconut milk (full fat if possible!)**You can also use heavy cream; it won’t hurt!
  • 1/4 cup of cashews, crushed finely (plus more whole)
  • 1 cup of Basmati rice

*** = you can leave out and substitute with whatever you want/have

Vegetables I highly recommend in addition to the ones above: green beans, broccoli, cauliflower, bell peppers (green, yellow, and/or red). I believe that peas, corns, and potatoes are very standard as well as cauliflower.

Fruits I recommend: I believe dried fruits are very authentic; often times golden raisins  are put in this dish by traditionalists; however, I did not have any so I threw in craisins (dried cranberries.) Also, diced pineapple can complement the dish and is used in some recipes! I would stick to dried fruits  and try to keep the fruits in similar taste profiles.

In addition to fruits and vegetables, you could certainly add chicken (or any other white meat); chicken korma is equally popular as Navratan Korma! 

A Peaceful Demonstration

  1. Heat the oil in a skillet over medium heat.
  2. Stir in the onion, and cook until tender. Tip: If your onions are taking a while to become translucent, throw a small (I mean a very little amount) of water to the pan with onions; the onions will sizzle and sweat faster!
  3. Once the onions are translucent, mix in ginger and garlic, and continue cooking 1 minute. You may add the curry powder at this point, if you wish. 
  4. While the onions are becoming aromatic, parboil (or microwave) your vegetables; at the very least, cook your potatoes!
  5. Also, either food process the cashews or mash up with a hammer in a plastic bag. They should be pulverized!
  6. Mix potatoes, carrots, cashews, and tomato sauce. Add sauce as needed (if vegetables are not well coated.) Season with salt and curry powder. Cook and stir 10 minutes, or until potatoes are tender. Leave mixture covered to 
  7. Meanwhile, measure out one cup of Basmati rice to two cups of water. Add a little bit of oil/butter and salt. Bring to a rolling boil, and immediately cover to release steam. Rice should be done in about ten minutes (make sure you take the heat down to low so you don’t burn your rice, and whatever you do, DO NOT OPEN THE LID.) Once the rice is almost finished steaming, throw in some frozen peas. Fluff rice with a fork and keep covered to stay warm.
  8. Going back to the sauce, stir in peas, corn, and cream (coconut milk) into the skillet. Reduce heat to low, cover, and simmer 10 minutes. The longer you simmer, the better. I recommend even putting this into a crock-pot if you would like to want until the next day, too.
  9. Before serving, throw in garam masala and sugar (garam masala should be saved towards the end as cooking can take away the flavor). Adjust seasonings to your taste. Sprinkle whole cashews, dried raisins, and other desired toppings.
  10. Serve rice with the Navratan Korma; you should also have garlic naan for the leftover sauce. Get those brownie points! 🙂


White Chicken Enchiladas with Green Chiles

12540607_10205588777891983_2190789161727716198_n

Happy Friday! I am so stoked that it’s the weekend. I graded so many papers this week that I think I am now partially blind, and my hand is marginally numb from correcting comma splices, run ons, and fragments. For the sake of my sanity, I am happy the weekend is here because I will be able to spend time with one of my best friends from New Jersey; she drove down to visit me on Wednesday night.

My secret weapon on Monday was an oven roasted chicken (or grocery store rotisserie chicken), and today I am using that same chicken to re-purpose for another meal. As you know from my previous post, I needed make ahead meals for this week because of my hectic work schedule. But as time consuming and stressful that work can be, I also wanted for my friend to have a freshly prepared, home cooked meal for when she arrived from her 9+ hour drive.  I needed the balance of convenience, simplicity, and flavor. It’s a great recipe for company because of its taste, affordability, and quantity.

And so when I was thinking about what to make for my friend, I thought about the recipe that I make almost all the time; it is nearly a routine meal. As much as I like to experiment and make new things, there is also something rewarding about making something familiar, well-practiced, and nearly fool proof. There is no risk and all award. It’s one of those recipes that will be added to my family’s rotation–it’s the go-to dinner for so many reasons, and I could not be happier to share this recipe with you.

The first time I came across the recipe was randomly on Pinterest; I went onto the Pioneer Woman’s website and stumbled upon her recipe. Although her recipe is the basis, I modify it a bit for my taste. Feel free to look at the original recipe and cross reference it with mine!

Alright, back to the nostalgia. I found this recipe on Pinterest after searching “Green Chile Recipes.” You see, the previous week I had Zach’s mother’s White Chicken Chili with Green Chiles (which is so good that I am sure eventually I’ll have to make a post about that, too!) and I knew this recipe would be equally easy to devour. It is the same flavor profile: sour cream, heavy cream, and green chiles.  Zach loves southwestern food, so I knew that making this recipe would be perfect for the both of us.

And although I say it’s great to make for a small company, I can honestly believe I’ve made it for myself, with no company over at all, countless times.

Get On The Bandwagon:

  • 2-1/2  to 3 cups cooked, shredded chicken
  • 2 cups chicken broth
  • 3 tablespoons canola oil
  • 10 corn or flour tortillas (depending on your preference)
  • 1 large yellow onion, finely diced
  • 3-4 cloves of garlic, minced finely
  • 3 4oz cans of whole roasted, diced green chiles
  • 1 teaspoon paprika
  • 1/2 cup heavy cream
  • 2 tablespoons butter
  • 2 tablespoons flour
  • 1 cup sour cream
  • 2-1/2 cups Monterey Jack cheese, shredded
  • 1/2 cup of Mexican Blend cheese, finely shredded
  • 9 X 13 pan
  • Two frying pans

On The Road:

  1. Optional step: Heat 2 tablespoons canola oil in a small skillet over medium to high heat to fry tortillas. Do not fry for longer than 10-20 seconds per side. You do not need to do this step if you don’t want a slightly crunch texture.
  2. To begin, tablespoon canola oil in separate skillet over medium heat. Add onions  and saute for 1-2 minutes. Next, add the garlic. Stir around and make sure the onions are cooked until translucency. Make sure you do not burn the garlic!
  3. Add chicken, half of the green chilis, and 1/2 teaspoon paprika. Stir together. Add more paprika to get a rosy color and to your taste. Add a bit of salt and pepper. No, I won’t tell you how much. Figure it out! 🙂
  4. Add 1/2 cup chicken broth to chicken and green chili mixture–stir to incorporate moisture. Next, add cream and stir, allowing mixture to bubble and get hot. Turn off heat and set aside. If the mixture looks liquid-y, turn up the heat to high to bubble up, and then turn the heat down to low. Stir around to desired consistency; you want moisture without excessive liquid.
  5. In a separate large skillet, melt butter and sprinkle in flour in equal parts to make a roux. Whisk together and cook over medium heat for a minute until the flour is well dissolved. Once the roux is formed, pour in the rest of the chicken broth, 1 1/2 cups. Whisk together and cook for another minute or two. Stir in the other half of the chilies. Reduce heat, then stir in sour cream. Add 1 1/2 cups grated cheese and stir to melt and make sure there is a thick consistency. Add 1/2 teaspoon paprika–but probably more. You want a rosy hue. Keep tasting and add salt and pepper as needed.
  6. Once the sauce is made, you must put together the enchiladas. Individually spoon chicken mixture into tortilla and roll up. Do not overstuff. Place seam side down in a 9 x 13 casserole dish.
  7. Pour cheese mixture all over the top of the tortillas. Admire its beauty.
  8. Top with the half cup of fiesta blend cheese. Put in a pre-heated, 350 degree oven for 30 minutes.
  9. Eat immediately! Put sour cream, hot sauce (I like Cholula),  chopped chives, or picante sauce to your liking. It’s flavorful alone without the condiments as well. 🙂


Croissant Honey Dijon Chicken Salad with Split Red Grapes and Roasted Pecans

12548848_10205565603032626_5410911449507926635_n

Happy Monday!

As I am writing this post, it is actually Sunday. Tomorrow is the last day of school for my students (I have block scheduling in the school I teach), and so, I will have 89 students handing in their final research paper (which are at a minimum of 4 pages each.) The math is not very comforting; I will be spending approximately 30 hours this week grading papers on top of proctoring the state examinations. I am dreading this week, but I want to take the stress off of myself by spending my weekend balancing…

Cleaning

Cooking

Relaxing (believe it or not!)

I am writing my blog in advance because I want to talk about planning your meals in advance. Often times, people think of meal planning as only important if one is dieting, or if someone is planning to entertain guests. Plan your meals and you will save money, time, and your health.

If your life is anything like mine, you are so busy during the work week and rarely have time to make lunch or dinner. So what happens? We fall to temptation; we go to fast food havens and order take out. We grab packaged candy bars and chips and hope for the best.

Now I know my last two posts were not the healthiest, but generally speaking, I like to eat a balanced, healthy meal at least 5 out of the 7 days of the week. But often times my goals combat the realities of the work place, and I, too, fall short. I’ll incessantly spend money going out to eat for convenience. There is just not enough time in the day…

Except, of course, there is time often the day before. We make time for the things we love like our friends, family and binge watching television shows on Netflix. And so, you should love yourself enough and prioritize food. If you plan your meals in advance, it will take a load off your shoulders for the week, and you can feel satisfied because you’ll have tasty home cooked meals that are affordable and easy to manipulate.

Another personal challenge I have is that I live alone; although, I often host parties and have friends over. During the work week, it just me, myself, and I which makes me even less motivated to cook. Luckily, I enjoy cooking and sharing what I make with the world. I hope that my blog can help you reconsider the way you prioritize your dinners, and hopefully, inspire you to do some meals ahead of time to relieve the stresses of our every day lives.

For today’s recipe, I knew I wanted to use chicken because it is very cost effective, tasty, and is versatile. My secret weapon for today is to either…

1.) Make a large roasted chicken

2.) Buy a rotisserie chicken already cooked

I will not judge you if you do the latter. I shred rotisserie chickens often times to make White Chicken Enchiladas with Green Chiles. It’s so good that it should be illegal. I use it in a pinch, but today, I wanted to make my own roasted chicken so I can control the seasonings.

My plan for today is to make my breakfast, lunch, and dinners ahead. I made snickerdoodle muffins so I can have a healthier* grab and go in the morning (healthier, yes, it’s not chia seed pudding or a kale shake). For lunch and dinner interchangeably, I made several spinach salads, and I cook the chicken to make some roasted chicken for dinner (duh), chicken enchiladas, and today’s blog post, Croissant Honey Dijon Chicken Salad with Split Red Grapes and Roasted Pecans. From one chicken, I am making three different types of meals and I am eating for the whole week. Winner, winner, chicken dinner! 😉

I don’t like chicken salad generally speaking, or any kind of “salad” that is ironically titled as such; there are usually no greens in sight, but mayonnaise reigns supreme.

I don’t like mayo. Go ahead and sue me, but I do use it as a binder for ingredients (like a crab cake). I will never use it as a condiment. Do not try to change my opinion on it–it’s nasty. But because there will be people who rally a petition against me if I say don’t use mayo when you prepare this recipe, I will allow it.

Instead of mayo, I used a healthy alternative by mixing Greek yogurt and sour cream. I totally left the mayo out because I’m a health nut, and it has nothing to do with my disgust for it–nope not at all. 🙂 If you are team mayo, feel free to replace my Greek yogurt for mayo, and the results should be the same.

I think what makes this chicken salad delicious (in addition to not having any mayonnaise in sight) is that it has elements of sophistication. I believe the chives and celery give a great flavor base; the honey and dijon mustard adds a classic French dimension; but most uniquely, it is on a buttery, flaky croissant, red grapes, and crushed roasted Pecans. I think the acidity of the fruit with the cool chicken is wonderful. It reminds me of an actual salad; in my opinion, the best salads have a balance of textures and taste. My favorite go to salad is grilled chicken, spinach, bleu cheese crumbles, dried cranberries, and pecans. The nuts, fruits, and cheese harmoniously balance each other out. I think that most sophisticated dishes incorporate more than one type of food group which is what brings it to that next level.

Similarly, this chicken salad has many different layers of flavor and textures. The best part? It’s super easy.

Make this chicken salad–you won’t regret it.

Step One: Roast Your Host (Please let it not be you as the cook–I meant the star of the show, your chicken…)

Roasted Chicken* 

1 whole chicken (about 4-5 pounds)

3 tablespoons of fresh thyme

1 tablespoon of salt (add more for the rub!)

1 tablespoon of pepper (add more!)

1 teaspoon of paprika** (optional)

1 lemon cut in quarters

3 tablespoons of Extra Virgin Olive Oil

12 cloves of garlic

Julienned vegetables (carrots and celery)***

***-optional–only if you plan on making a chicken soup from the drippings.

*-Skip this step if you are purchasing a ready made rotisserie chicken. If you are not making your chicken, make sure it is as plainly seasoned; don’t get something too strong of one flavor as it would not be as versatile for other dishes for the week.

  1.  Preheat your oven to 375 degrees. Get a deep covered baker, or a roasting pan (just make sure you can cover your chicken for the first part) and spray with cooking spray or brush on olive oil.
  2. Remove giblets and excessive fat from the chicken (you know, that creepy bag with your chicken’s organs; please don’t cook it!) Dry your chicken with a paper towel. If you have time, let your chicken “dry out” in the refrigerator to get extra crispy skin (my favorite part of the chicken.)
  3. Pour about two tablespoons of extra virgin olive oil on chicken. You may use butter, if you prefer. Rub all on chicken and make sure it is evenly distributed.
  4. Grab a handful of thyme sprigs. Please use fresh thyme as dried thyme does not have the same “oomph.” Pick out the leaves and generously spread all over the chicken.
  5. Salt and pepper the chicken generously to create a light rub. If you like, you may add paprika as well.
  6. Quarter a lemon and shove inside the cavity of the chicken. Squeeze one quarter over the chicken, or more to your taste. Throw in some thyme sprigs into the cavity as well.
  7. Smash six cloves of garlic and throw whole cloves inside the chicken.
  8. Smash six more cloves and put around the chicken in the baker. **If you have carrots and celery, julienne these and put around the chicken as this would be a good base for chicken soup.**
  9. Roast your chicken in the oven for an hour covered.
  10. After an hour has passed, take off the lid and cook for about 35-45 minutes until chicken meat is white and skin is lightly browned and crispy. Once finished cooking, let cool before carving; do not carve immediately as you’ll lose all the juices and likely burn your fingers!

Step Two: The Cool Factor

2.5-3 cups cooked, shredded chicken

1 1/2 cups chopped celery (diced finely)

1 1/2 cups red grapes, halved

1/2 cup of roasted pecans (you can use sweetened ones like I did!)

3 tablespoons of diced chives, or alternatively, 2 green onions, thinly sliced*

1 cup Greek yogurt (I used Fage–and please get plain!)

1/4 cup sour cream

1 teaspoon black pepper *

1 teaspoon salt *

Two tablespoons of honey*

Two tablespoons of Dijon mustard*

*-start with this amount and add to taste

juice of 1 small lemon

4-5 croissants

  1. If you recently cooked the chicken, let it cool until it isn’t too hot to handle. Once chicken is cool, shred with a fork, hands, or combination if you’re like me. Be sure to sort through bones and be careful!
  2. Slice and dice thinly celery, chives (or green onions) and throw into a large mixing bowl. Also, slice red grapes in half and throw into the bowl.
  3. Scoop out the Greek yogurt and sour cream and place in mixing bowl.
  4. Throw shredded chicken into mixing bowl and squeeze lemon on top of the meat.  Stir to combine.
  5. Once throughly mixed, add salt, pepper, Dijon mustard, and honey. Mix again, and season to your liking. Tip: Rip a small piece of croissant and taste mixture to be accurate assess how it will taste “all together.”
  6. Ideally, you should let the mixture stay in the refrigerator overnight to let the flavors set. If you don’t have the time, a few hours chilled will do too.
  7. When ready to make the sandwich, split a croissant in half. Put approximately half a cup on the bottom half of the sandwich. Roughly chop some roasted pecans and place on top of the chicken salad. Put the top of the croissant and admire its beauty.
  8. Eat it for the rest of your work week and be happy!

Enjoy the salad! Make sure you use all of your roasted chicken for multiple purposes in addition to this sandwich. Some recommendations: Chicken Noodle Soup, Chicken Enchiladas, and Pulled BBQ Chicken.

See you on Friday! Hopefully, my papers won’t completely deprive me of a life!


Shrimp “Ya-Ya” Pesto and Fettuccine + More

945581_10205555064849178_3684182854291623678_n

Happy Friday!

Tonight, I was dying to relive my recent visit to New Orleans (also known as NOLA). It is the foodie capital of the United States. NOLA blends French finesse and Creole seasonings and spices like no other. Mmm.

And while that’s all fine and good, I needed to be realistic. I was mindful of the fact that I have been teaching all day, and tutoring for three hours past 3:00. It’s the typical plight of the working woman, except I cannot simply admit that I am too busy to cook even though I actually am (maybe children will change that!)

And so, I wanted to cook NOLA quickly…and it dawned on me.

Make Shrimp Ya-Ya. . I know it doesn’t even sound like a dish. But that’s because its deceptively simple title has a hidden complexity. The name is simply fooling the skeptics into thinking this is nothing short of extraordinary.

18689340-mmmain

This is the restaurant’s take of Shrimp “Ya-Ya”–and I want to take it all.

Now most readers have probably heard of “pesto” and of course “Alfredo,” but it’s highly unlikely you have heard of “Ya-Ya” unless you frequent the south. It doesn’t sound fancy or classy, but it tastes divine.

So here’s what Shrimp Ya-Ya is in this highly technical mathematical formula:

Pesto + Alfredo + Crushed Red Pepper Flakes = Shrimp “Ya-Ya.”

It’s a creamy pesto that is served with hot, steamy garlic French bread and a few Gulf shrimp. The shrimp are delicious–no doubt. But my favorite part of the meal is mopping the sauce with the garlic bread. I refuse to leave one bit of sauce, so I always ask for extra bread like a good Atkin’s dieter does.  And if you are ever in New Orleans, please go to the restaurant in which this dinner was inspired by; it is Zach and I’s favorite low key bar, Le Bayou. They make delicious hurricanes to wash these down, too. Please order two or three for me, okay?

Now the only difference with my dinner tonight is that I added a starch: I wanted pasta. Grits would go well with this (but not if you’re in a hurry–grits are for when you’re watching grass grow) for a southern flair–any starch! If I had French bread available, that would be my go to–dip all that sauce until it is inevitably gone.

Now feel free to modify this recipe and break it down. Use the pesto and Alfredo exclusively when you’re feeling like making something simple. Pesto is great as a spread for sandwiches–so if you have extra, put it aside! Alfredo can’t be stored like pesto, but it comes together so quickly that you’ll be able to make it any time.

Shrimp Ya-Ya Pesto and Fettuccine (Serves Four*)

*-Could easily be modified for two or one!

Now let’s go solve the equation that I’ll likely be too selfish to divide…(insert cheesy puns from this point forward)

The Right Angle (Alfredo Sauce)

1 tablespoon butter

1/4 cup heavy whipping cream

6 tablespoons grated Parmesan cheese

3/4 teaspoon minced garlic

1⁄2 teaspoon chopped fresh parsley

1⁄8 teaspoon crushed red pepper (optional)

The Hypotenuse (Pesto Sauce)

2 cups fresh basil leaves

2 tablespoons pine nuts (pignoli)** (If you don’t have any in your area, you can substitute with another nut like walnuts, but I believe it’s best to leave it out if you have a nut that is not in the same family)

2-3 cloves of garlic (just don’t kiss anyone)

3-4 tablespoons olive oil

1/4 cup plus 2 tablespoons grated Parmesan cheese, but honestly, probably more

The Legs (Shrimp)

1/2 teaspoon kosher salt

1 pound extra jumbo shrimp, peeled and deveined

2 teaspoons crushed red pepper

Pasta

Half Box of Fettuccine** (only if you want pasta–if you want traditional Shrimp Ya-Ya, just prepare sauce and shrimp.)

Make the sauces:

PESTO (make this first)

  1. Rinse basil leaves of any dirt (if freshly pulled from a garden.) In the a food processor or blender, add basil, pine nuts, and garlic, and pulse to combine.
  2. While the mixture is pulsating, add 2 tablespoons  of extra virgin olive oil in a steady stream, and process until a smooth paste forms.
  3. Add 2 tablespoons Parmesan and salt, and process 30 seconds more. Add cheese to taste.
  4. Use a spatula and put pesto on the side in a bowl.

ALFREDO

  1. In a medium saucepan, melt butter over medium heat. Add cream, and simmer for 5 minutes.
  2. Add Parmesan and garlic, stirring until cheese melts. Stir around and do not burn the garlic!
  3. Remove from heat, and let thicken. Add parsley and red pepper, if desired. The red pepper flake is spicy, but it’s necessary for the NOLA distinction. Also, if you’re afraid of spice–no worries; the cream will offset it.

Boil the water** (only if you’re making pasta): Salt the water generously. Throw in a half a box of fettuccine and stir to keep pasta from sticking.

Check Your Work (Final Steps):

  1. Get shrimp out–if frozen, thaw in cold running water, if fresh, leave them out.
  2. In a large nonstick skillet, heat remaining 1 tablespoon olive oil over medium-high heat.
  3. Add shrimp and season with salt, pepper, and red pepper flakes lightly–cook until pink and firm.
  4. Remove the shrimp for a minute and place aside.
  5. Following, stir in red pepper flake, pesto mixture, and Alfredo. Cook until sauce is slightly thickened. Top with remaining 1/4 cup or more of Parmesan. Lower the heat if necessary to thicken.

***Drain pasta when al dente (about 12 minutes), and lightly toss strands of fettuccine in sauce with tongs. Plate and serve shrimp on top,and put more straight pesto in the center for color and flavor. Just remember, if you are making this with pasta, it will have a less creamy appearance, but will still be equally delicious. Eat immediately.

Enjoy your weekend, and stay tuned for Monday! 🙂


Cajun Chicken Alfredo with Sliced Bell Peppers and Peas

1044604_10205532235758465_4682752379146835536_n

I know, I know. It’s right after the holidays, and everyone’s pants are feeling tight (am I alone in saying that?) I should be posting a recipe on some kind of Kale Smoothie or a 30 Calorie Brownie made out of ice cubes. This is the time of year that everyone hits the gym and makes healthful decisions: quit smoking, drinking, fried chicken (ugh), chocolate chip cookies (no!)

But I want to start the New Year being candid for my resolution. I honestly love to eat decadent desserts and butter laden dinners. In fact, to make my colleagues tremble, I made cinnamon buns last night:

12509534_10205532240038572_7242923103692064995_n

I know–I’m cruel.

I believe that making cinnamon rolls yesterday and making Alfredo sauce today is quite metaphorical: I am representing the right eat well, and to not deprive one’s self.

And don’t get me wrong, healthful food can be very delicious. But let’s face it–there are only so many substitutes; at the end of the day, the chickpea crusted pizza just isn’t the melty, cheesy pizza delight you once knew.

Will I post recipes that are healthy? Of course, but this week, everything will be borderline gluttonous.

So let’s get back to business. I was inspired to make Cajun Chicken Alfredo for two reasons…

1.) I was just in New Orleans for New Years.

2.) I needed to make a guilty pleasure.

New Orleans will inspire me all week. Cajun food is so comforting, and I love how it blends so many cultures in one. I had a Blackened Red Grouper in a Pernod Cream Sauce that reminded me how much I love spicy fish that is cooled off with succulent cream. Oh, did I mention it came on a bed of homemade fettuccine? Oh my god. Someone please take me back!

Alfredo sauce has many variations, and I will not say that the way I make it is the only way. To make a good Alfredo sauce, you should have…

1.) Butter

2.) Olive Oil

3.) Grated Parmigiana Cheese

4.) Garlic

To make a greater Alfredo sauce, you should add to the previous list…

1.) Egg Yolk(s)

2.) Heavy Cream

Most people put cream in their Alfredo sauce, but technically, the cheese and the butter alone could suffice as they coagulate. Some people thicken their sauce with a flour/butter roux. In my experience, incorporating all of the above makes the Alfredo that you’ll crave.

For this Alfredo, you can modify as much as your heart desires. You don’t have any bell peppers? Just throw in some broccoli (in fact, I think broccoli is my favorite vegetable compliment to Alfredo.) You don’t have chicken? You are a vegetarian? Leave it out. You have chicken but don’t like spiciness? Just salt and pepper that bad boy. You make the rules!

Cajun Chicken Alfredo with Sliced Bell Peppers and Peas

Serves: 2 (easily could be turned into 4!)

Stage Crew:

Pasta Pot and Strainer

Cast Iron Pan

Cast Iron Grill Pan

Tongs

Santoku Knife (or any knife you like to cut veggies!)

Garlic Press* (not needed, but simply lovely)

Lovin’ Oven @ 350 Degrees

Tonight’s Cast:

Two Chicken Breasts (no need to pound thinly)

Half Box of Fettuccine

Five Mini Sweet Bell Peppers (Orange, Yellow, and Red)

Half Cup of Peas

Four Garlic Cloves

Blackened Seasoning (or you can use Chili Powder, Paprika, Granulated Garlic, Salt, Pepper, and Italian Seasoning)

Half Cup of Heavy Cream (or more if you’re feeling indulgent. Just look at the consistency, but I personally like more cheese than cream.)

Half Stick of Butter

1 cup of Parmigiana Cheese (freshly grated, if possible)

Stage Directions: 

1.) Preheat your oven at 350 degrees. While the oven is heating up, season your chicken liberally with blackening seasoning or a blend of the spices mentioned above. Make sure you coat both sides of the chicken.

2.) Put your burner on medium high heat and place the cast iron grill pan on the burner. Make sure your pan is coated in oil (either sprayed with Pam or a light layer of Canola oil.)

10330507_10205532235838467_8450929852110293373_n

3.) Once the grill pan is hot, place seasoned chicken breasts on top. Let them cook until grill marks appear, approximately 7-8 minutes. (P.S: Do not lift up the chicken; let it cook! If you pick it up pre maturely, you won’t get grill marks or the blackened crispy coloring!)

4.) While the chicken is grilling, fill your pasta pot with salty, salty water. Put your stove to high heat to get the water rolling.

5.) Don’t forget! Make sure you turned your chicken over at the appropriate time!

6.) While you’re waiting for the beautiful char to come onto the other side of the chicken, julienne (slice thinly) sweet baby bell peppers into 1/4 inch strips. The thinner, the better!12509818_10205532236118474_4554408398754110434_n

7.) On another burner with olive oil (about a tablespoon), put four cloves of garlic into a garlic press (or mince finely if you do not have a press.) While that is working, take out your chicken and put it in the oven to finish. Take out the chicken three minutes before serving.

Tip: If you have a garlic press, you don’t have to peel the garlic. Just throw the whole clove in there and the garlic will push out. Voila!

12438950_10205532236438482_6312352977362751752_n

8.) Stir around garlic (make sure you do not burn it–if you burn it, throw it out and start over) with sliced peppers.

9.) Once the peppers are softened (1-2 minutes), remove them and put on the side. Try to leave most of the garlic in the pan.

10.) In the pan, melt half a stick of butter on medium heat and stir garlic around. Then add a cup of grated parmigiana. Allow the cheese to form a bond with the butter. Once the mixture thickens, slowly add half a cup of heavy cream. If it looks thin and watery, raise the heat and then drop once it comes to a boil. The cooler temperature will make the sauce thicken. Also, you can add more cheese because you’re worth it (I mean, it’s for the sauce.)1931345_10205532237278503_5678273551620735294_n

11.) Once the mixture is thickened and the pot is not too hot (very important! it should be on a lower setting), add an egg yolk and stir around well. You will see that the egg yolk will make the sauce more rich and yellow (exactly what you want.)

12.) At this point, your pasta should be done (al dente–about 12 minute). Drain your pasta and throw the pasta in the pan and toss around with tongs. Take your chicken out of the oven and let it rest (otherwise it won’t be juicy–don’t be tempted!). Once the chicken has rested, slice into strips.

13.) Once your pasta is incorporated, you may throw your peppers back in, and the peas frozen (they will cook in the sauce.) Throw in the chicken. Just don’t throw a fit when your friend tells you that you should have eaten a salad. You know better.

12509032_10205532237438507_431423893764804464_n

10366216_10205532237758515_7227773630149939320_n

Enter a caption

Bon appetit! Cheers to increased waistlines! 🙂