White Chicken Enchiladas with Green Chiles

12540607_10205588777891983_2190789161727716198_n

Happy Friday! I am so stoked that it’s the weekend. I graded so many papers this week that I think I am now partially blind, and my hand is marginally numb from correcting comma splices, run ons, and fragments. For the sake of my sanity, I am happy the weekend is here because I will be able to spend time with one of my best friends from New Jersey; she drove down to visit me on Wednesday night.

My secret weapon on Monday was an oven roasted chicken (or grocery store rotisserie chicken), and today I am using that same chicken to re-purpose for another meal. As you know from my previous post, I needed make ahead meals for this week because of my hectic work schedule. But as time consuming and stressful that work can be, I also wanted for my friend to have a freshly prepared, home cooked meal for when she arrived from her 9+ hour drive.  I needed the balance of convenience, simplicity, and flavor. It’s a great recipe for company because of its taste, affordability, and quantity.

And so when I was thinking about what to make for my friend, I thought about the recipe that I make almost all the time; it is nearly a routine meal. As much as I like to experiment and make new things, there is also something rewarding about making something familiar, well-practiced, and nearly fool proof. There is no risk and all award. It’s one of those recipes that will be added to my family’s rotation–it’s the go-to dinner for so many reasons, and I could not be happier to share this recipe with you.

The first time I came across the recipe was randomly on Pinterest; I went onto the Pioneer Woman’s website and stumbled upon her recipe. Although her recipe is the basis, I modify it a bit for my taste. Feel free to look at the original recipe and cross reference it with mine!

Alright, back to the nostalgia. I found this recipe on Pinterest after searching “Green Chile Recipes.” You see, the previous week I had Zach’s mother’s White Chicken Chili with Green Chiles (which is so good that I am sure eventually I’ll have to make a post about that, too!) and I knew this recipe would be equally easy to devour. It is the same flavor profile: sour cream, heavy cream, and green chiles.  Zach loves southwestern food, so I knew that making this recipe would be perfect for the both of us.

And although I say it’s great to make for a small company, I can honestly believe I’ve made it for myself, with no company over at all, countless times.

Get On The Bandwagon:

  • 2-1/2  to 3 cups cooked, shredded chicken
  • 2 cups chicken broth
  • 3 tablespoons canola oil
  • 10 corn or flour tortillas (depending on your preference)
  • 1 large yellow onion, finely diced
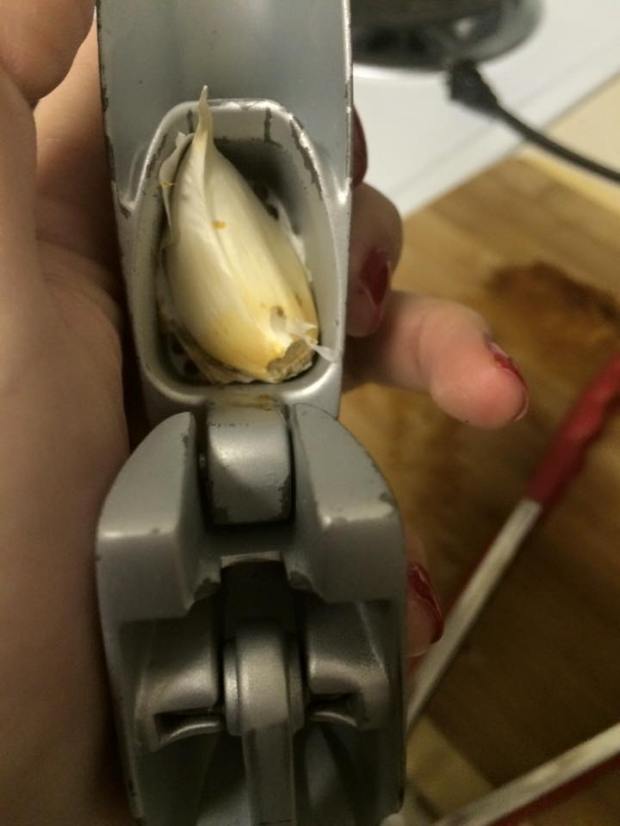
  • 3-4 cloves of garlic, minced finely
  • 3 4oz cans of whole roasted, diced green chiles
  • 1 teaspoon paprika
  • 1/2 cup heavy cream
  • 2 tablespoons butter
  • 2 tablespoons flour
  • 1 cup sour cream
  • 2-1/2 cups Monterey Jack cheese, shredded
  • 1/2 cup of Mexican Blend cheese, finely shredded
  • 9 X 13 pan
  • Two frying pans

On The Road:

  1. Optional step: Heat 2 tablespoons canola oil in a small skillet over medium to high heat to fry tortillas. Do not fry for longer than 10-20 seconds per side. You do not need to do this step if you don’t want a slightly crunch texture.
  2. To begin, tablespoon canola oil in separate skillet over medium heat. Add onions  and saute for 1-2 minutes. Next, add the garlic. Stir around and make sure the onions are cooked until translucency. Make sure you do not burn the garlic!
  3. Add chicken, half of the green chilis, and 1/2 teaspoon paprika. Stir together. Add more paprika to get a rosy color and to your taste. Add a bit of salt and pepper. No, I won’t tell you how much. Figure it out! 🙂
  4. Add 1/2 cup chicken broth to chicken and green chili mixture–stir to incorporate moisture. Next, add cream and stir, allowing mixture to bubble and get hot. Turn off heat and set aside. If the mixture looks liquid-y, turn up the heat to high to bubble up, and then turn the heat down to low. Stir around to desired consistency; you want moisture without excessive liquid.
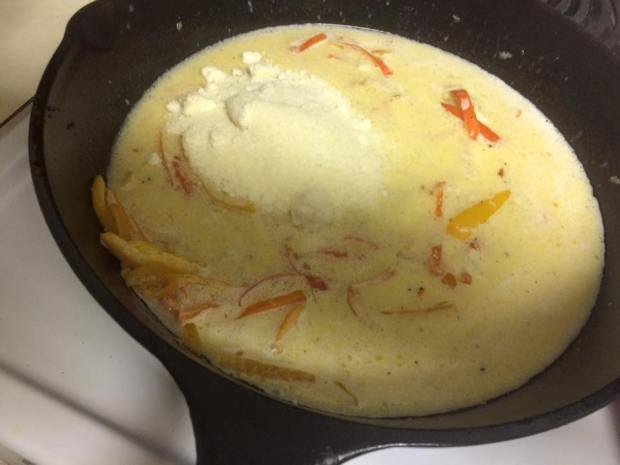
  5. In a separate large skillet, melt butter and sprinkle in flour in equal parts to make a roux. Whisk together and cook over medium heat for a minute until the flour is well dissolved. Once the roux is formed, pour in the rest of the chicken broth, 1 1/2 cups. Whisk together and cook for another minute or two. Stir in the other half of the chilies. Reduce heat, then stir in sour cream. Add 1 1/2 cups grated cheese and stir to melt and make sure there is a thick consistency. Add 1/2 teaspoon paprika–but probably more. You want a rosy hue. Keep tasting and add salt and pepper as needed.
  6. Once the sauce is made, you must put together the enchiladas. Individually spoon chicken mixture into tortilla and roll up. Do not overstuff. Place seam side down in a 9 x 13 casserole dish.
  7. Pour cheese mixture all over the top of the tortillas. Admire its beauty.
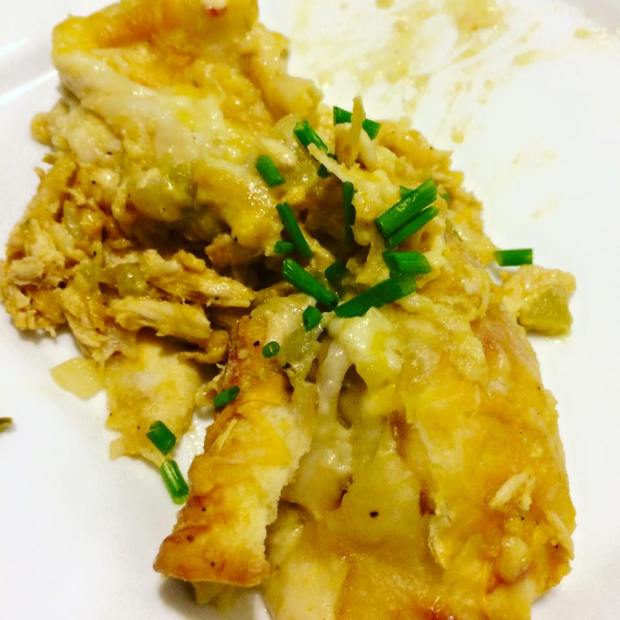
  8. Top with the half cup of fiesta blend cheese. Put in a pre-heated, 350 degree oven for 30 minutes.
  9. Eat immediately! Put sour cream, hot sauce (I like Cholula),  chopped chives, or picante sauce to your liking. It’s flavorful alone without the condiments as well. 🙂


Croissant Honey Dijon Chicken Salad with Split Red Grapes and Roasted Pecans

12548848_10205565603032626_5410911449507926635_n

Happy Monday!

As I am writing this post, it is actually Sunday. Tomorrow is the last day of school for my students (I have block scheduling in the school I teach), and so, I will have 89 students handing in their final research paper (which are at a minimum of 4 pages each.) The math is not very comforting; I will be spending approximately 30 hours this week grading papers on top of proctoring the state examinations. I am dreading this week, but I want to take the stress off of myself by spending my weekend balancing…

Cleaning

Cooking

Relaxing (believe it or not!)

I am writing my blog in advance because I want to talk about planning your meals in advance. Often times, people think of meal planning as only important if one is dieting, or if someone is planning to entertain guests. Plan your meals and you will save money, time, and your health.

If your life is anything like mine, you are so busy during the work week and rarely have time to make lunch or dinner. So what happens? We fall to temptation; we go to fast food havens and order take out. We grab packaged candy bars and chips and hope for the best.

Now I know my last two posts were not the healthiest, but generally speaking, I like to eat a balanced, healthy meal at least 5 out of the 7 days of the week. But often times my goals combat the realities of the work place, and I, too, fall short. I’ll incessantly spend money going out to eat for convenience. There is just not enough time in the day…

Except, of course, there is time often the day before. We make time for the things we love like our friends, family and binge watching television shows on Netflix. And so, you should love yourself enough and prioritize food. If you plan your meals in advance, it will take a load off your shoulders for the week, and you can feel satisfied because you’ll have tasty home cooked meals that are affordable and easy to manipulate.

Another personal challenge I have is that I live alone; although, I often host parties and have friends over. During the work week, it just me, myself, and I which makes me even less motivated to cook. Luckily, I enjoy cooking and sharing what I make with the world. I hope that my blog can help you reconsider the way you prioritize your dinners, and hopefully, inspire you to do some meals ahead of time to relieve the stresses of our every day lives.

For today’s recipe, I knew I wanted to use chicken because it is very cost effective, tasty, and is versatile. My secret weapon for today is to either…

1.) Make a large roasted chicken

2.) Buy a rotisserie chicken already cooked

I will not judge you if you do the latter. I shred rotisserie chickens often times to make White Chicken Enchiladas with Green Chiles. It’s so good that it should be illegal. I use it in a pinch, but today, I wanted to make my own roasted chicken so I can control the seasonings.

My plan for today is to make my breakfast, lunch, and dinners ahead. I made snickerdoodle muffins so I can have a healthier* grab and go in the morning (healthier, yes, it’s not chia seed pudding or a kale shake). For lunch and dinner interchangeably, I made several spinach salads, and I cook the chicken to make some roasted chicken for dinner (duh), chicken enchiladas, and today’s blog post, Croissant Honey Dijon Chicken Salad with Split Red Grapes and Roasted Pecans. From one chicken, I am making three different types of meals and I am eating for the whole week. Winner, winner, chicken dinner! 😉

I don’t like chicken salad generally speaking, or any kind of “salad” that is ironically titled as such; there are usually no greens in sight, but mayonnaise reigns supreme.

I don’t like mayo. Go ahead and sue me, but I do use it as a binder for ingredients (like a crab cake). I will never use it as a condiment. Do not try to change my opinion on it–it’s nasty. But because there will be people who rally a petition against me if I say don’t use mayo when you prepare this recipe, I will allow it.

Instead of mayo, I used a healthy alternative by mixing Greek yogurt and sour cream. I totally left the mayo out because I’m a health nut, and it has nothing to do with my disgust for it–nope not at all. 🙂 If you are team mayo, feel free to replace my Greek yogurt for mayo, and the results should be the same.

I think what makes this chicken salad delicious (in addition to not having any mayonnaise in sight) is that it has elements of sophistication. I believe the chives and celery give a great flavor base; the honey and dijon mustard adds a classic French dimension; but most uniquely, it is on a buttery, flaky croissant, red grapes, and crushed roasted Pecans. I think the acidity of the fruit with the cool chicken is wonderful. It reminds me of an actual salad; in my opinion, the best salads have a balance of textures and taste. My favorite go to salad is grilled chicken, spinach, bleu cheese crumbles, dried cranberries, and pecans. The nuts, fruits, and cheese harmoniously balance each other out. I think that most sophisticated dishes incorporate more than one type of food group which is what brings it to that next level.

Similarly, this chicken salad has many different layers of flavor and textures. The best part? It’s super easy.

Make this chicken salad–you won’t regret it.

Step One: Roast Your Host (Please let it not be you as the cook–I meant the star of the show, your chicken…)

Roasted Chicken* 

1 whole chicken (about 4-5 pounds)

3 tablespoons of fresh thyme

1 tablespoon of salt (add more for the rub!)

1 tablespoon of pepper (add more!)

1 teaspoon of paprika** (optional)

1 lemon cut in quarters

3 tablespoons of Extra Virgin Olive Oil

12 cloves of garlic

Julienned vegetables (carrots and celery)***

***-optional–only if you plan on making a chicken soup from the drippings.

*-Skip this step if you are purchasing a ready made rotisserie chicken. If you are not making your chicken, make sure it is as plainly seasoned; don’t get something too strong of one flavor as it would not be as versatile for other dishes for the week.

  1.  Preheat your oven to 375 degrees. Get a deep covered baker, or a roasting pan (just make sure you can cover your chicken for the first part) and spray with cooking spray or brush on olive oil.
  2. Remove giblets and excessive fat from the chicken (you know, that creepy bag with your chicken’s organs; please don’t cook it!) Dry your chicken with a paper towel. If you have time, let your chicken “dry out” in the refrigerator to get extra crispy skin (my favorite part of the chicken.)
  3. Pour about two tablespoons of extra virgin olive oil on chicken. You may use butter, if you prefer. Rub all on chicken and make sure it is evenly distributed.
  4. Grab a handful of thyme sprigs. Please use fresh thyme as dried thyme does not have the same “oomph.” Pick out the leaves and generously spread all over the chicken.
  5. Salt and pepper the chicken generously to create a light rub. If you like, you may add paprika as well.
  6. Quarter a lemon and shove inside the cavity of the chicken. Squeeze one quarter over the chicken, or more to your taste. Throw in some thyme sprigs into the cavity as well.
  7. Smash six cloves of garlic and throw whole cloves inside the chicken.
  8. Smash six more cloves and put around the chicken in the baker. **If you have carrots and celery, julienne these and put around the chicken as this would be a good base for chicken soup.**
  9. Roast your chicken in the oven for an hour covered.
  10. After an hour has passed, take off the lid and cook for about 35-45 minutes until chicken meat is white and skin is lightly browned and crispy. Once finished cooking, let cool before carving; do not carve immediately as you’ll lose all the juices and likely burn your fingers!

Step Two: The Cool Factor

2.5-3 cups cooked, shredded chicken

1 1/2 cups chopped celery (diced finely)

1 1/2 cups red grapes, halved

1/2 cup of roasted pecans (you can use sweetened ones like I did!)

3 tablespoons of diced chives, or alternatively, 2 green onions, thinly sliced*

1 cup Greek yogurt (I used Fage–and please get plain!)

1/4 cup sour cream

1 teaspoon black pepper *

1 teaspoon salt *

Two tablespoons of honey*

Two tablespoons of Dijon mustard*

*-start with this amount and add to taste

juice of 1 small lemon

4-5 croissants

  1. If you recently cooked the chicken, let it cool until it isn’t too hot to handle. Once chicken is cool, shred with a fork, hands, or combination if you’re like me. Be sure to sort through bones and be careful!
  2. Slice and dice thinly celery, chives (or green onions) and throw into a large mixing bowl. Also, slice red grapes in half and throw into the bowl.
  3. Scoop out the Greek yogurt and sour cream and place in mixing bowl.
  4. Throw shredded chicken into mixing bowl and squeeze lemon on top of the meat.  Stir to combine.
  5. Once throughly mixed, add salt, pepper, Dijon mustard, and honey. Mix again, and season to your liking. Tip: Rip a small piece of croissant and taste mixture to be accurate assess how it will taste “all together.”
  6. Ideally, you should let the mixture stay in the refrigerator overnight to let the flavors set. If you don’t have the time, a few hours chilled will do too.
  7. When ready to make the sandwich, split a croissant in half. Put approximately half a cup on the bottom half of the sandwich. Roughly chop some roasted pecans and place on top of the chicken salad. Put the top of the croissant and admire its beauty.
  8. Eat it for the rest of your work week and be happy!

Enjoy the salad! Make sure you use all of your roasted chicken for multiple purposes in addition to this sandwich. Some recommendations: Chicken Noodle Soup, Chicken Enchiladas, and Pulled BBQ Chicken.

See you on Friday! Hopefully, my papers won’t completely deprive me of a life!


Shrimp “Ya-Ya” Pesto and Fettuccine + More

945581_10205555064849178_3684182854291623678_n

Happy Friday!

Tonight, I was dying to relive my recent visit to New Orleans (also known as NOLA). It is the foodie capital of the United States. NOLA blends French finesse and Creole seasonings and spices like no other. Mmm.

And while that’s all fine and good, I needed to be realistic. I was mindful of the fact that I have been teaching all day, and tutoring for three hours past 3:00. It’s the typical plight of the working woman, except I cannot simply admit that I am too busy to cook even though I actually am (maybe children will change that!)

And so, I wanted to cook NOLA quickly…and it dawned on me.

Make Shrimp Ya-Ya. . I know it doesn’t even sound like a dish. But that’s because its deceptively simple title has a hidden complexity. The name is simply fooling the skeptics into thinking this is nothing short of extraordinary.

18689340-mmmain

This is the restaurant’s take of Shrimp “Ya-Ya”–and I want to take it all.

Now most readers have probably heard of “pesto” and of course “Alfredo,” but it’s highly unlikely you have heard of “Ya-Ya” unless you frequent the south. It doesn’t sound fancy or classy, but it tastes divine.

So here’s what Shrimp Ya-Ya is in this highly technical mathematical formula:

Pesto + Alfredo + Crushed Red Pepper Flakes = Shrimp “Ya-Ya.”

It’s a creamy pesto that is served with hot, steamy garlic French bread and a few Gulf shrimp. The shrimp are delicious–no doubt. But my favorite part of the meal is mopping the sauce with the garlic bread. I refuse to leave one bit of sauce, so I always ask for extra bread like a good Atkin’s dieter does.  And if you are ever in New Orleans, please go to the restaurant in which this dinner was inspired by; it is Zach and I’s favorite low key bar, Le Bayou. They make delicious hurricanes to wash these down, too. Please order two or three for me, okay?

Now the only difference with my dinner tonight is that I added a starch: I wanted pasta. Grits would go well with this (but not if you’re in a hurry–grits are for when you’re watching grass grow) for a southern flair–any starch! If I had French bread available, that would be my go to–dip all that sauce until it is inevitably gone.

Now feel free to modify this recipe and break it down. Use the pesto and Alfredo exclusively when you’re feeling like making something simple. Pesto is great as a spread for sandwiches–so if you have extra, put it aside! Alfredo can’t be stored like pesto, but it comes together so quickly that you’ll be able to make it any time.

Shrimp Ya-Ya Pesto and Fettuccine (Serves Four*)

*-Could easily be modified for two or one!

Now let’s go solve the equation that I’ll likely be too selfish to divide…(insert cheesy puns from this point forward)

The Right Angle (Alfredo Sauce)

1 tablespoon butter

1/4 cup heavy whipping cream

6 tablespoons grated Parmesan cheese

3/4 teaspoon minced garlic

1⁄2 teaspoon chopped fresh parsley

1⁄8 teaspoon crushed red pepper (optional)

The Hypotenuse (Pesto Sauce)

2 cups fresh basil leaves

2 tablespoons pine nuts (pignoli)** (If you don’t have any in your area, you can substitute with another nut like walnuts, but I believe it’s best to leave it out if you have a nut that is not in the same family)

2-3 cloves of garlic (just don’t kiss anyone)

3-4 tablespoons olive oil

1/4 cup plus 2 tablespoons grated Parmesan cheese, but honestly, probably more

The Legs (Shrimp)

1/2 teaspoon kosher salt

1 pound extra jumbo shrimp, peeled and deveined

2 teaspoons crushed red pepper

Pasta

Half Box of Fettuccine** (only if you want pasta–if you want traditional Shrimp Ya-Ya, just prepare sauce and shrimp.)

Make the sauces:

PESTO (make this first)

  1. Rinse basil leaves of any dirt (if freshly pulled from a garden.) In the a food processor or blender, add basil, pine nuts, and garlic, and pulse to combine.
  2. While the mixture is pulsating, add 2 tablespoons  of extra virgin olive oil in a steady stream, and process until a smooth paste forms.
  3. Add 2 tablespoons Parmesan and salt, and process 30 seconds more. Add cheese to taste.
  4. Use a spatula and put pesto on the side in a bowl.

ALFREDO

  1. In a medium saucepan, melt butter over medium heat. Add cream, and simmer for 5 minutes.
  2. Add Parmesan and garlic, stirring until cheese melts. Stir around and do not burn the garlic!
  3. Remove from heat, and let thicken. Add parsley and red pepper, if desired. The red pepper flake is spicy, but it’s necessary for the NOLA distinction. Also, if you’re afraid of spice–no worries; the cream will offset it.

Boil the water** (only if you’re making pasta): Salt the water generously. Throw in a half a box of fettuccine and stir to keep pasta from sticking.

Check Your Work (Final Steps):

  1. Get shrimp out–if frozen, thaw in cold running water, if fresh, leave them out.
  2. In a large nonstick skillet, heat remaining 1 tablespoon olive oil over medium-high heat.
  3. Add shrimp and season with salt, pepper, and red pepper flakes lightly–cook until pink and firm.
  4. Remove the shrimp for a minute and place aside.
  5. Following, stir in red pepper flake, pesto mixture, and Alfredo. Cook until sauce is slightly thickened. Top with remaining 1/4 cup or more of Parmesan. Lower the heat if necessary to thicken.

***Drain pasta when al dente (about 12 minutes), and lightly toss strands of fettuccine in sauce with tongs. Plate and serve shrimp on top,and put more straight pesto in the center for color and flavor. Just remember, if you are making this with pasta, it will have a less creamy appearance, but will still be equally delicious. Eat immediately.

Enjoy your weekend, and stay tuned for Monday! 🙂


Cajun Chicken Alfredo with Sliced Bell Peppers and Peas

1044604_10205532235758465_4682752379146835536_n

I know, I know. It’s right after the holidays, and everyone’s pants are feeling tight (am I alone in saying that?) I should be posting a recipe on some kind of Kale Smoothie or a 30 Calorie Brownie made out of ice cubes. This is the time of year that everyone hits the gym and makes healthful decisions: quit smoking, drinking, fried chicken (ugh), chocolate chip cookies (no!)

But I want to start the New Year being candid for my resolution. I honestly love to eat decadent desserts and butter laden dinners. In fact, to make my colleagues tremble, I made cinnamon buns last night:

12509534_10205532240038572_7242923103692064995_n

I know–I’m cruel.

I believe that making cinnamon rolls yesterday and making Alfredo sauce today is quite metaphorical: I am representing the right eat well, and to not deprive one’s self.

And don’t get me wrong, healthful food can be very delicious. But let’s face it–there are only so many substitutes; at the end of the day, the chickpea crusted pizza just isn’t the melty, cheesy pizza delight you once knew.

Will I post recipes that are healthy? Of course, but this week, everything will be borderline gluttonous.

So let’s get back to business. I was inspired to make Cajun Chicken Alfredo for two reasons…

1.) I was just in New Orleans for New Years.

2.) I needed to make a guilty pleasure.

New Orleans will inspire me all week. Cajun food is so comforting, and I love how it blends so many cultures in one. I had a Blackened Red Grouper in a Pernod Cream Sauce that reminded me how much I love spicy fish that is cooled off with succulent cream. Oh, did I mention it came on a bed of homemade fettuccine? Oh my god. Someone please take me back!

Alfredo sauce has many variations, and I will not say that the way I make it is the only way. To make a good Alfredo sauce, you should have…

1.) Butter

2.) Olive Oil

3.) Grated Parmigiana Cheese

4.) Garlic

To make a greater Alfredo sauce, you should add to the previous list…

1.) Egg Yolk(s)

2.) Heavy Cream

Most people put cream in their Alfredo sauce, but technically, the cheese and the butter alone could suffice as they coagulate. Some people thicken their sauce with a flour/butter roux. In my experience, incorporating all of the above makes the Alfredo that you’ll crave.

For this Alfredo, you can modify as much as your heart desires. You don’t have any bell peppers? Just throw in some broccoli (in fact, I think broccoli is my favorite vegetable compliment to Alfredo.) You don’t have chicken? You are a vegetarian? Leave it out. You have chicken but don’t like spiciness? Just salt and pepper that bad boy. You make the rules!

Cajun Chicken Alfredo with Sliced Bell Peppers and Peas

Serves: 2 (easily could be turned into 4!)

Stage Crew:

Pasta Pot and Strainer

Cast Iron Pan

Cast Iron Grill Pan

Tongs

Santoku Knife (or any knife you like to cut veggies!)

Garlic Press* (not needed, but simply lovely)

Lovin’ Oven @ 350 Degrees

Tonight’s Cast:

Two Chicken Breasts (no need to pound thinly)

Half Box of Fettuccine

Five Mini Sweet Bell Peppers (Orange, Yellow, and Red)

Half Cup of Peas

Four Garlic Cloves

Blackened Seasoning (or you can use Chili Powder, Paprika, Granulated Garlic, Salt, Pepper, and Italian Seasoning)

Half Cup of Heavy Cream (or more if you’re feeling indulgent. Just look at the consistency, but I personally like more cheese than cream.)

Half Stick of Butter

1 cup of Parmigiana Cheese (freshly grated, if possible)

Stage Directions: 

1.) Preheat your oven at 350 degrees. While the oven is heating up, season your chicken liberally with blackening seasoning or a blend of the spices mentioned above. Make sure you coat both sides of the chicken.

2.) Put your burner on medium high heat and place the cast iron grill pan on the burner. Make sure your pan is coated in oil (either sprayed with Pam or a light layer of Canola oil.)

10330507_10205532235838467_8450929852110293373_n

3.) Once the grill pan is hot, place seasoned chicken breasts on top. Let them cook until grill marks appear, approximately 7-8 minutes. (P.S: Do not lift up the chicken; let it cook! If you pick it up pre maturely, you won’t get grill marks or the blackened crispy coloring!)

4.) While the chicken is grilling, fill your pasta pot with salty, salty water. Put your stove to high heat to get the water rolling.

5.) Don’t forget! Make sure you turned your chicken over at the appropriate time!

6.) While you’re waiting for the beautiful char to come onto the other side of the chicken, julienne (slice thinly) sweet baby bell peppers into 1/4 inch strips. The thinner, the better!12509818_10205532236118474_4554408398754110434_n

7.) On another burner with olive oil (about a tablespoon), put four cloves of garlic into a garlic press (or mince finely if you do not have a press.) While that is working, take out your chicken and put it in the oven to finish. Take out the chicken three minutes before serving.

Tip: If you have a garlic press, you don’t have to peel the garlic. Just throw the whole clove in there and the garlic will push out. Voila!

12438950_10205532236438482_6312352977362751752_n

8.) Stir around garlic (make sure you do not burn it–if you burn it, throw it out and start over) with sliced peppers.

9.) Once the peppers are softened (1-2 minutes), remove them and put on the side. Try to leave most of the garlic in the pan.

10.) In the pan, melt half a stick of butter on medium heat and stir garlic around. Then add a cup of grated parmigiana. Allow the cheese to form a bond with the butter. Once the mixture thickens, slowly add half a cup of heavy cream. If it looks thin and watery, raise the heat and then drop once it comes to a boil. The cooler temperature will make the sauce thicken. Also, you can add more cheese because you’re worth it (I mean, it’s for the sauce.)1931345_10205532237278503_5678273551620735294_n

11.) Once the mixture is thickened and the pot is not too hot (very important! it should be on a lower setting), add an egg yolk and stir around well. You will see that the egg yolk will make the sauce more rich and yellow (exactly what you want.)

12.) At this point, your pasta should be done (al dente–about 12 minute). Drain your pasta and throw the pasta in the pan and toss around with tongs. Take your chicken out of the oven and let it rest (otherwise it won’t be juicy–don’t be tempted!). Once the chicken has rested, slice into strips.

13.) Once your pasta is incorporated, you may throw your peppers back in, and the peas frozen (they will cook in the sauce.) Throw in the chicken. Just don’t throw a fit when your friend tells you that you should have eaten a salad. You know better.

12509032_10205532237438507_431423893764804464_n

10366216_10205532237758515_7227773630149939320_n

Enter a caption

Bon appetit! Cheers to increased waistlines! 🙂