Happy Monday! I will be doing two posts today to make up for my long absence from the blog!
Shrimp Scampi is the classic lemony, garlicy Italian delight. I hardly make shrimp, let alone Shrimp Scampi, despite my undying love for it sauteed, fried, grilled, as a dumpling filling. My husband just isn’t into shrimp; hey, to each their own.
But tonight, I just really wanted shrimp. I put my needs before my husband’s (for the first time ever…ha), and it turns out that even the non-lover of shrimp enjoyed this one! We were both in absolute awe. I haven’t made this in years, but it suddenly came back to me, just like most Italian dishes I grew up making and enjoying.
This was one of those meals where every bite was just perfect. I did a lot of this by feel, so I am doing my very best with my approximation of how much I used of each ingredient. I will be sure to make it again and get the exact measurements for those of you who need a recipe to feel reassured! 🙂
I hope you enjoy. We most certainly did! 🙂
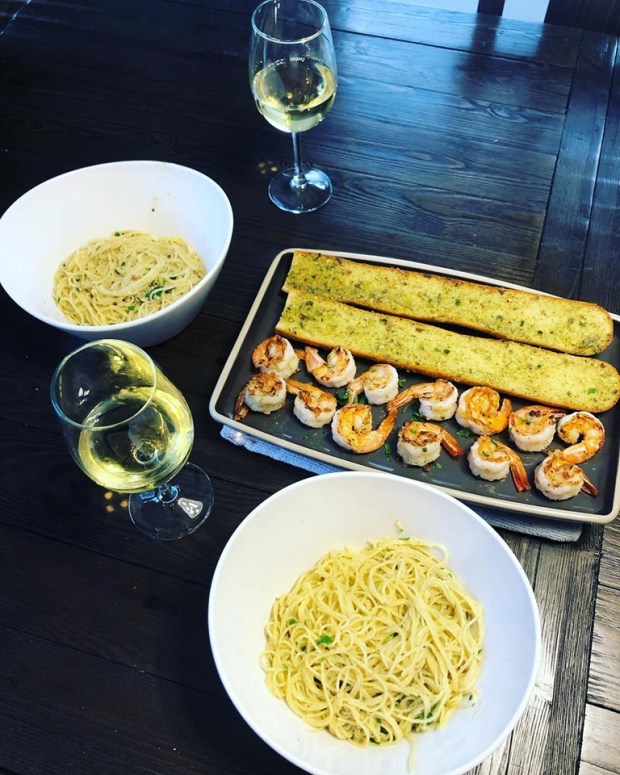
Shrimp Scampi with Angel Hair
1 pound angel hair pasta (or different pasta if you desire–angel hair cooks the fastest, though!)
6 tablespoons olive oil, divided (2 for shrimp, 4 for pan sauce)
1.5-2 pounds of uncooked, extra large shrimp, peeled and deveined (leave the tails on for presentation–also, keep shells if you want to make small shrimp stock)
1 tablespoon of sea salt (NOT for cooking–only for brining the shrimp!)
5 cloves garlic, minced
1/2 teaspoon red pepper flakes (if you’re not into spicy, you can do 1/4 teaspoon)
2 teaspoons of garlic salt (I used the grinder from Trader Joe’s), divided (1 for shrimp, 1 for pasta)
1 teaspoon of Tastefully Simple Garlic Bread Seasoning, divided (1/2 teaspoon for shrimp, 1/2 teaspoon for pasta)
**(This seasoning is optional, but I love it! If you can’t find it, use a similar seasoning that has some or all of the following: garlic, onion, parsley, red bell pepper, chives).
1 lemon, juiced, plus 1/2 lemon, zested (make sure there’s no white, bitter pith)
1/2 cup dry white wine (I used a Chardonnay–be sure to drink the rest with dinner)
5 tablespoons salted butter (plus, I added more butter from the garlic bread butter spread–figure you’ll need a stick and a half for both)
1/4 cup freshly chopped parsley leaves
Garlic Bread Baguette
1 French, store-bought baguette
1 stick of unsalted butter, softened
1 tablespoon of Tastefully Simple Garlic Bread Seasoning (If you can’t find it, use a similar seasoning that has some or all of the following: garlic, onion, parsley, red bell pepper, chives).
Directions for Garlic Bread Baguette
- Make sure your stick of butter is softened. If it’s not, use your microwave setting to do so (do not melt it!)
- Using a spatula, mix the Garlic Bread Seasoning with the butter. Let sit for 30 minutes for the flavors to meld.
- Cut your baguette in half and then slice the middle to make two even pieces.
- Once the Garlic Bread Butter flavors have melded, spread your butter evenly on the baguette. **
- **Note: Don’t be shy. You do not, however, need to use ALL the butter. Some of the leftover butter will be used for the shrimp scampi to finish!**
- Pre-heat your oven to 400 degrees.
- When your sauce is almost done reducing, put your bread in the oven on a baking tray. It should take no more than 5-6 minutes. Check for doneness periodically. Be sure to toast to a golden brown, but not over bake!
Directions for Shrimp Scampi
- First, peel and devein your shrimp (leave tails on for presentation). **Optional, but recommended: keep your shells and make a quick shrimp stock by boiling hot water and pouring it over the shells that are wrapped in cheesecloth). Steep for at least 15 minutes.
- Next, add deveined and peeled shrimp to a bowl of cold water (about 3-4 cups) and add a tablespoon of sea salt (note: do not use hot or even warm water as that will literally COOK the shrimp). Swirl the shrimp around in the salt water and brine for at least 20 minutes–may do so for up to an hour.
- While the shrimp are in the brine and you are finishing prepping, get a large pot of water to boil for pasta.
- Mince up your garlic (or use a garlic press, like I do), roughly chop your parsley, and zest your lemon. Once you’re done zesting the lemon, cut in half to use the juice. Roll the lemon with the palm of your hand to get the most juice out of it.
- Add the pasta to a large pot of boiling salted water, over medium heat, and cook until al dente. Angel hair pasta should take no more than five minutes! Feel free to substitute a different pasta, like spaghetti or linguine, if desired, and cook to specified direction on the pasta box. Leave the pasta in the colander and drizzle a little olive oil to prevent sticking.
- Once at least 20 minutes have passed, drain the shrimp and blot with a paper towel. It’s okay if there is a little bit of water left (but not too much).
- Add two tablespoons of olive oil, garlic salt (1 teaspoon), and Garlic Bread Seasoning (1/2 teaspoon) to shrimp. Toss to coat. If grilling, add to ungreased grill pan once your sauce is almost done reducing.**
- For your sauce, heat a large 12-inch skillet over medium-high heat. Add the olive oil.
- ***Note: I did not cook the shrimp in the pan like most people do (I wanted the grilled taste), so what is listed below is what most people will do if they do not have an indoor grill pan. If you do want to do what I did, preheat your grill pan to medium-high heat for 4-5 minutes and grill your shrimp (as mentioned later) when your sauce is almost done reducing.**
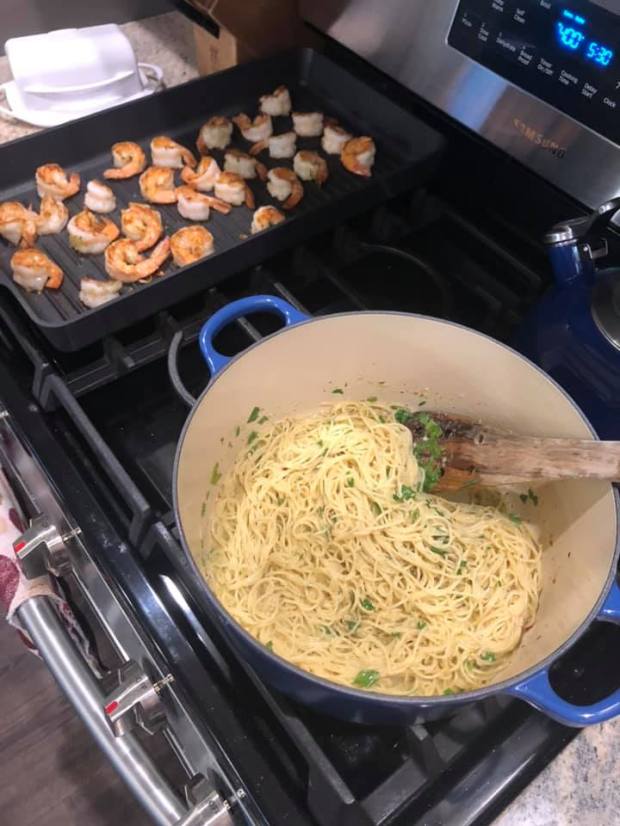
- Once shimmering and hot, add the shrimp and saute until just cooked through, about 2 to 3 minutes. Remove to a plate and reserve. (Only for those without a grill pan.)
- Add the garlic and red pepper flakes to the skillet, then saute for until the garlic is fragrant, about 1 minute. Add the lemon juice and white wine and raise the heat to high. Let the liquid reduce for 2 to 3 minutes. Whisk in the butter, add a ladleful of the pasta cooking water (if you made shrimp stock, add a little bit of that as well) and return the shrimp. Remove from the heat.
- Drain the pasta in a colander, and add it to the skillet along with the chopped parsley and toss. Add the lemon zest and adjust the seasonings with salt and pepper, to taste.
- Add remaining Garlic Bread Butter (that was not used on the baguette) onto hot pasta to finish–about 1/4 cup worth.
- Transfer to a serving platter and serve immediately.


 Happy Friday!
